
Download and install Inkscape.
Designed by:
Colin "MrSwirlyEyes" Keef
Inkscape is a free and open source professional vector graphics editor similar to Adobe Illustrator, Corel Draw, Freehand, or Xara X. Inkscape uses Scalable Vector Graphics (SVG) as its native format.
In this tutorial we will walk you through the process of installing Inkscape on any of the popular operating systems: Windows, Mac OS X, and Linux.
In this module we will download and install Inkscape. If you are using a Windows computer, the process is simple. If you are using MacOS or Linux it may be a little bit more involved.
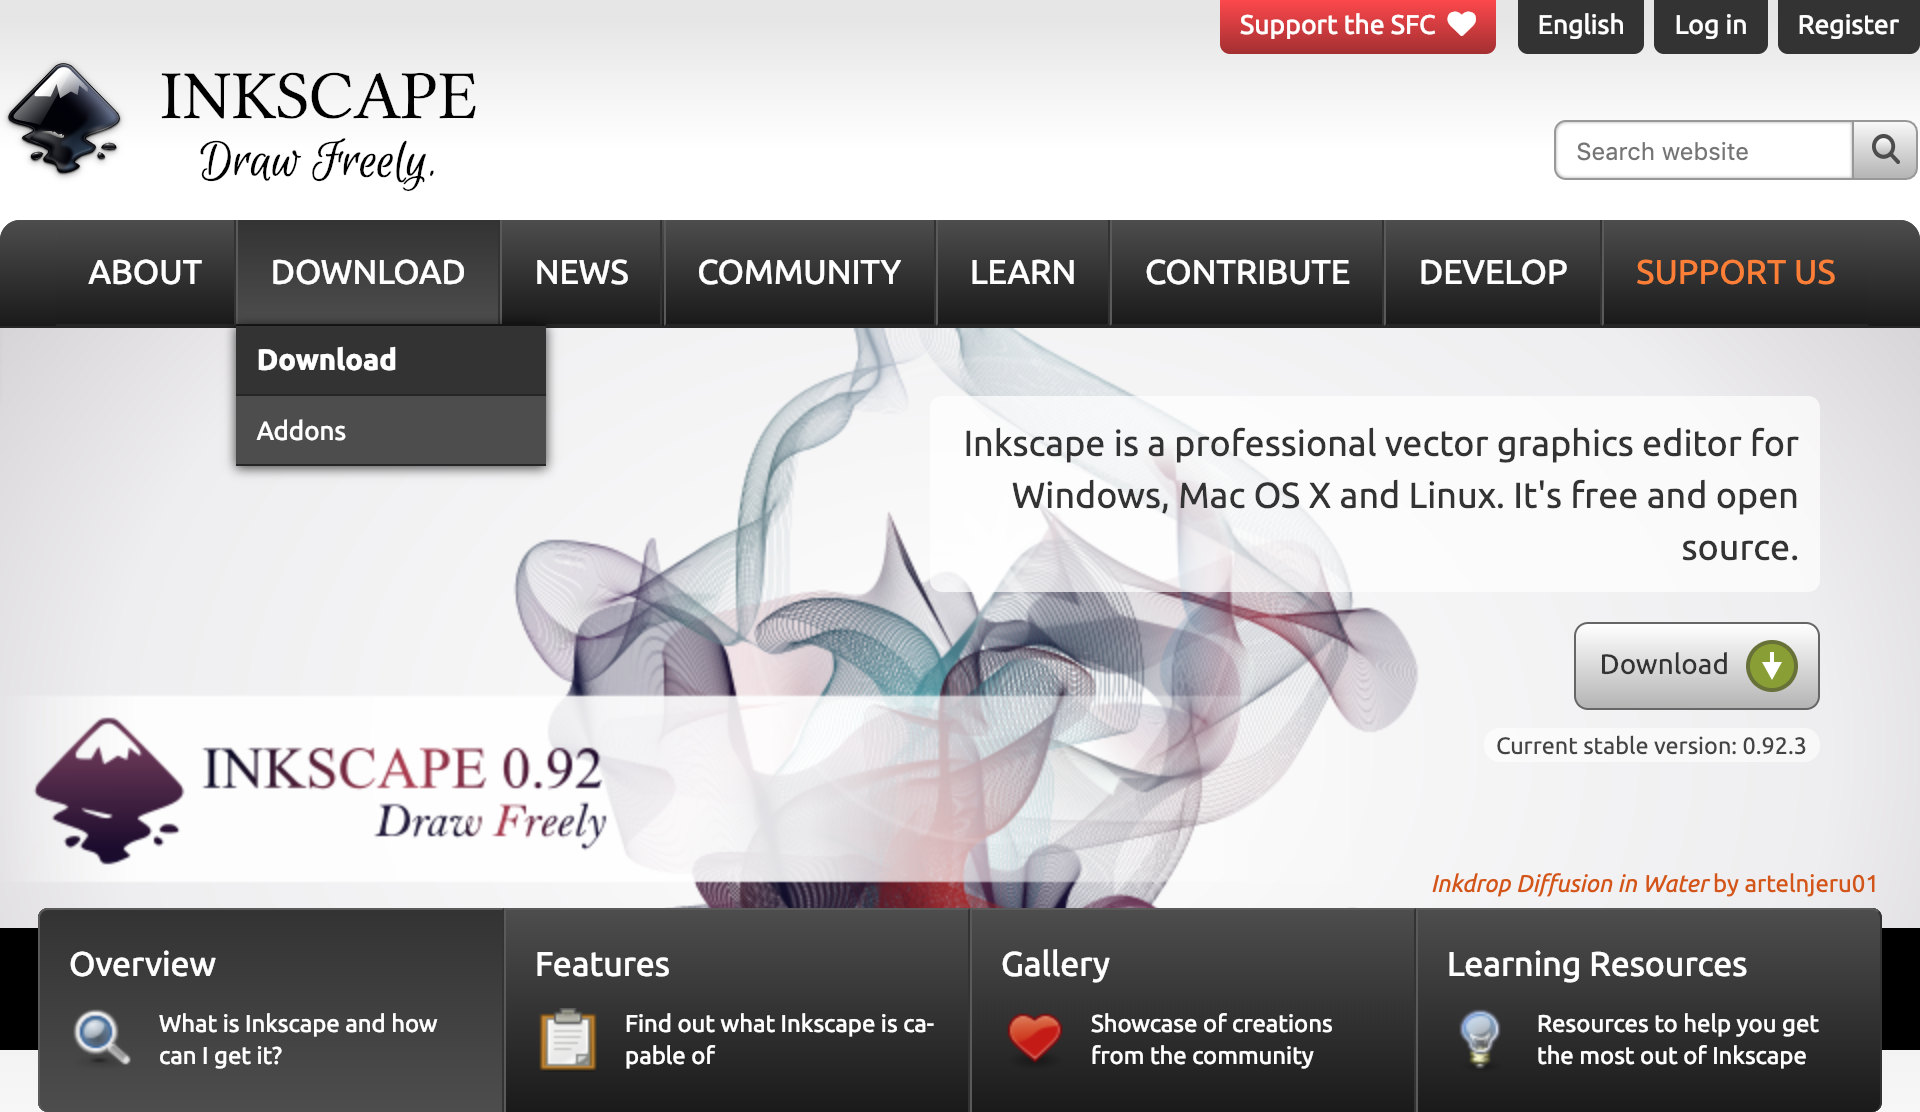
Navigate to the Inkscape homepage.
Navigate to the DOWNLOAD drop down menu and click Download.
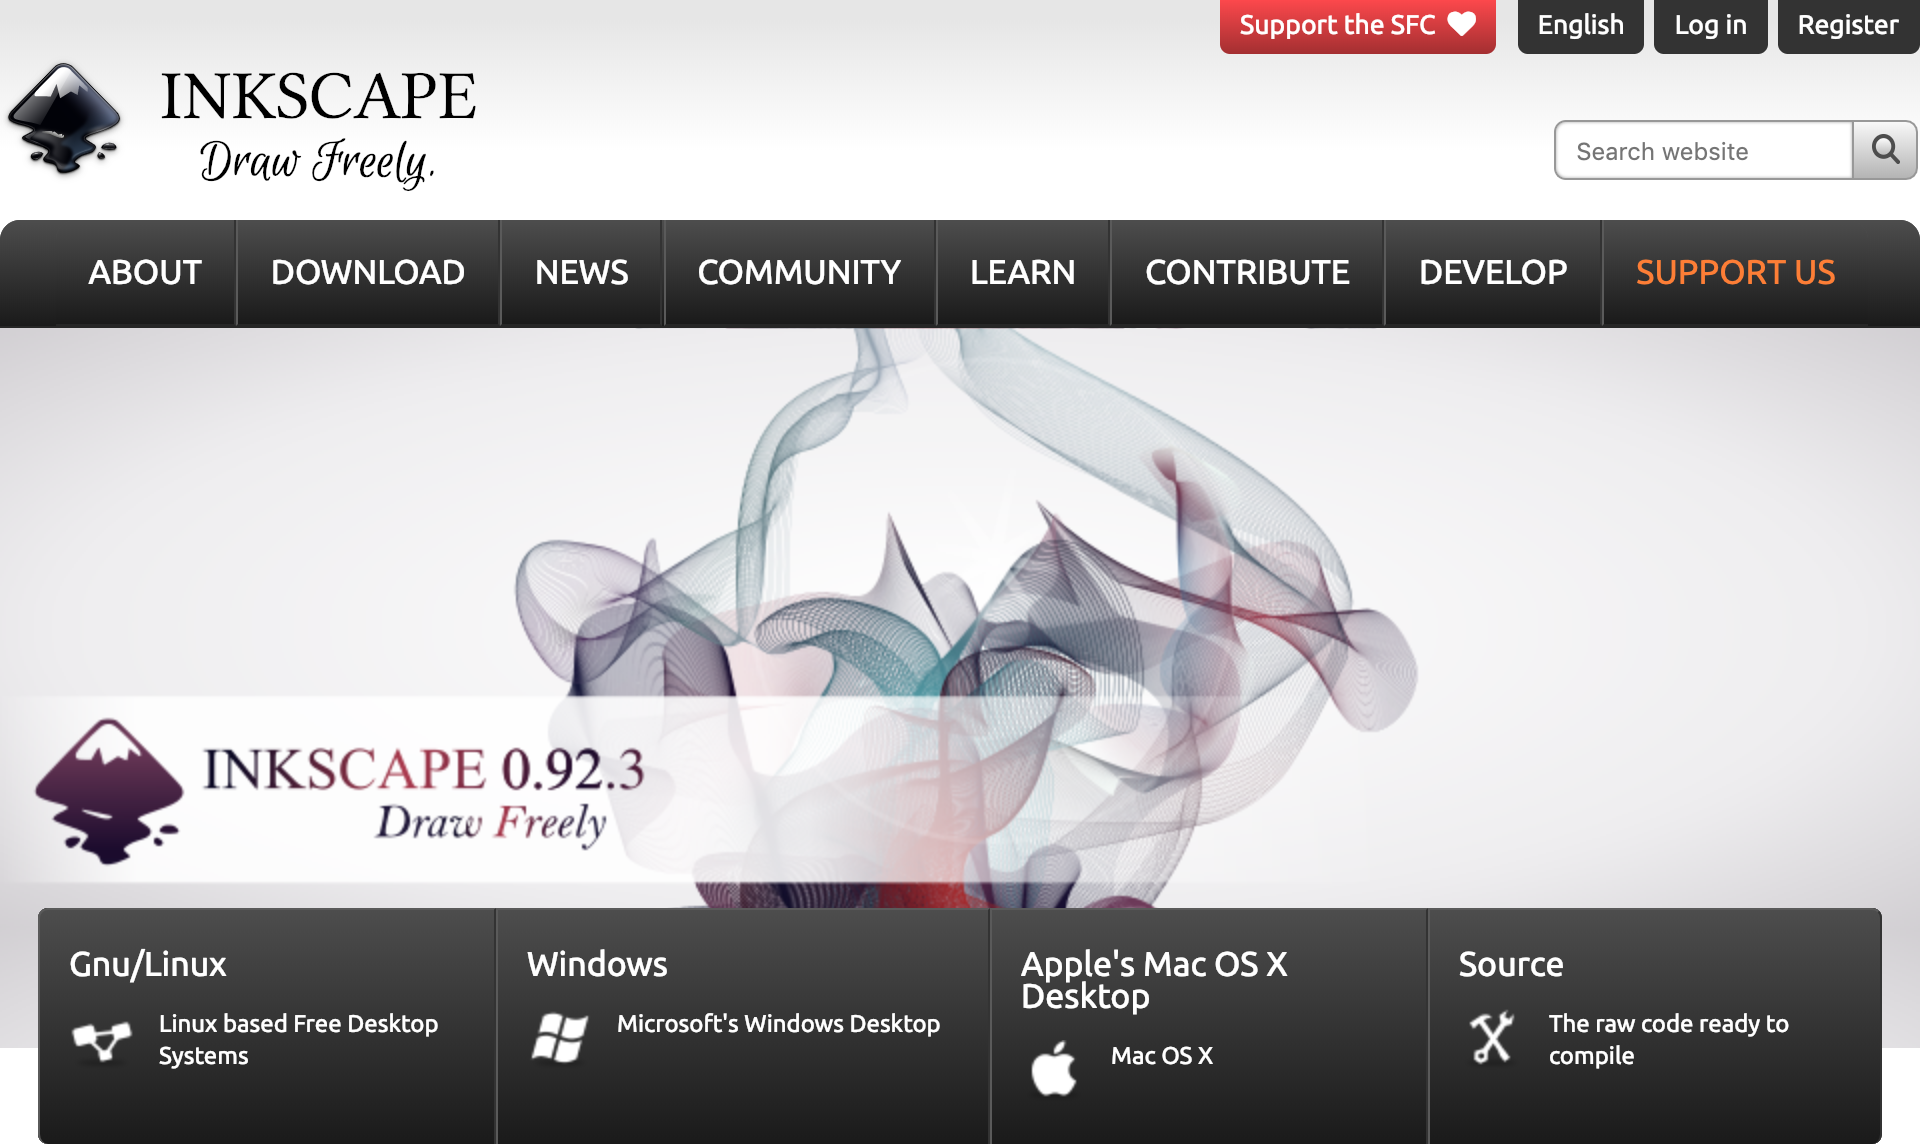
Inkscape supports Linux, Linux, and Mac OS X. Select the appropriate option for your system.
todo
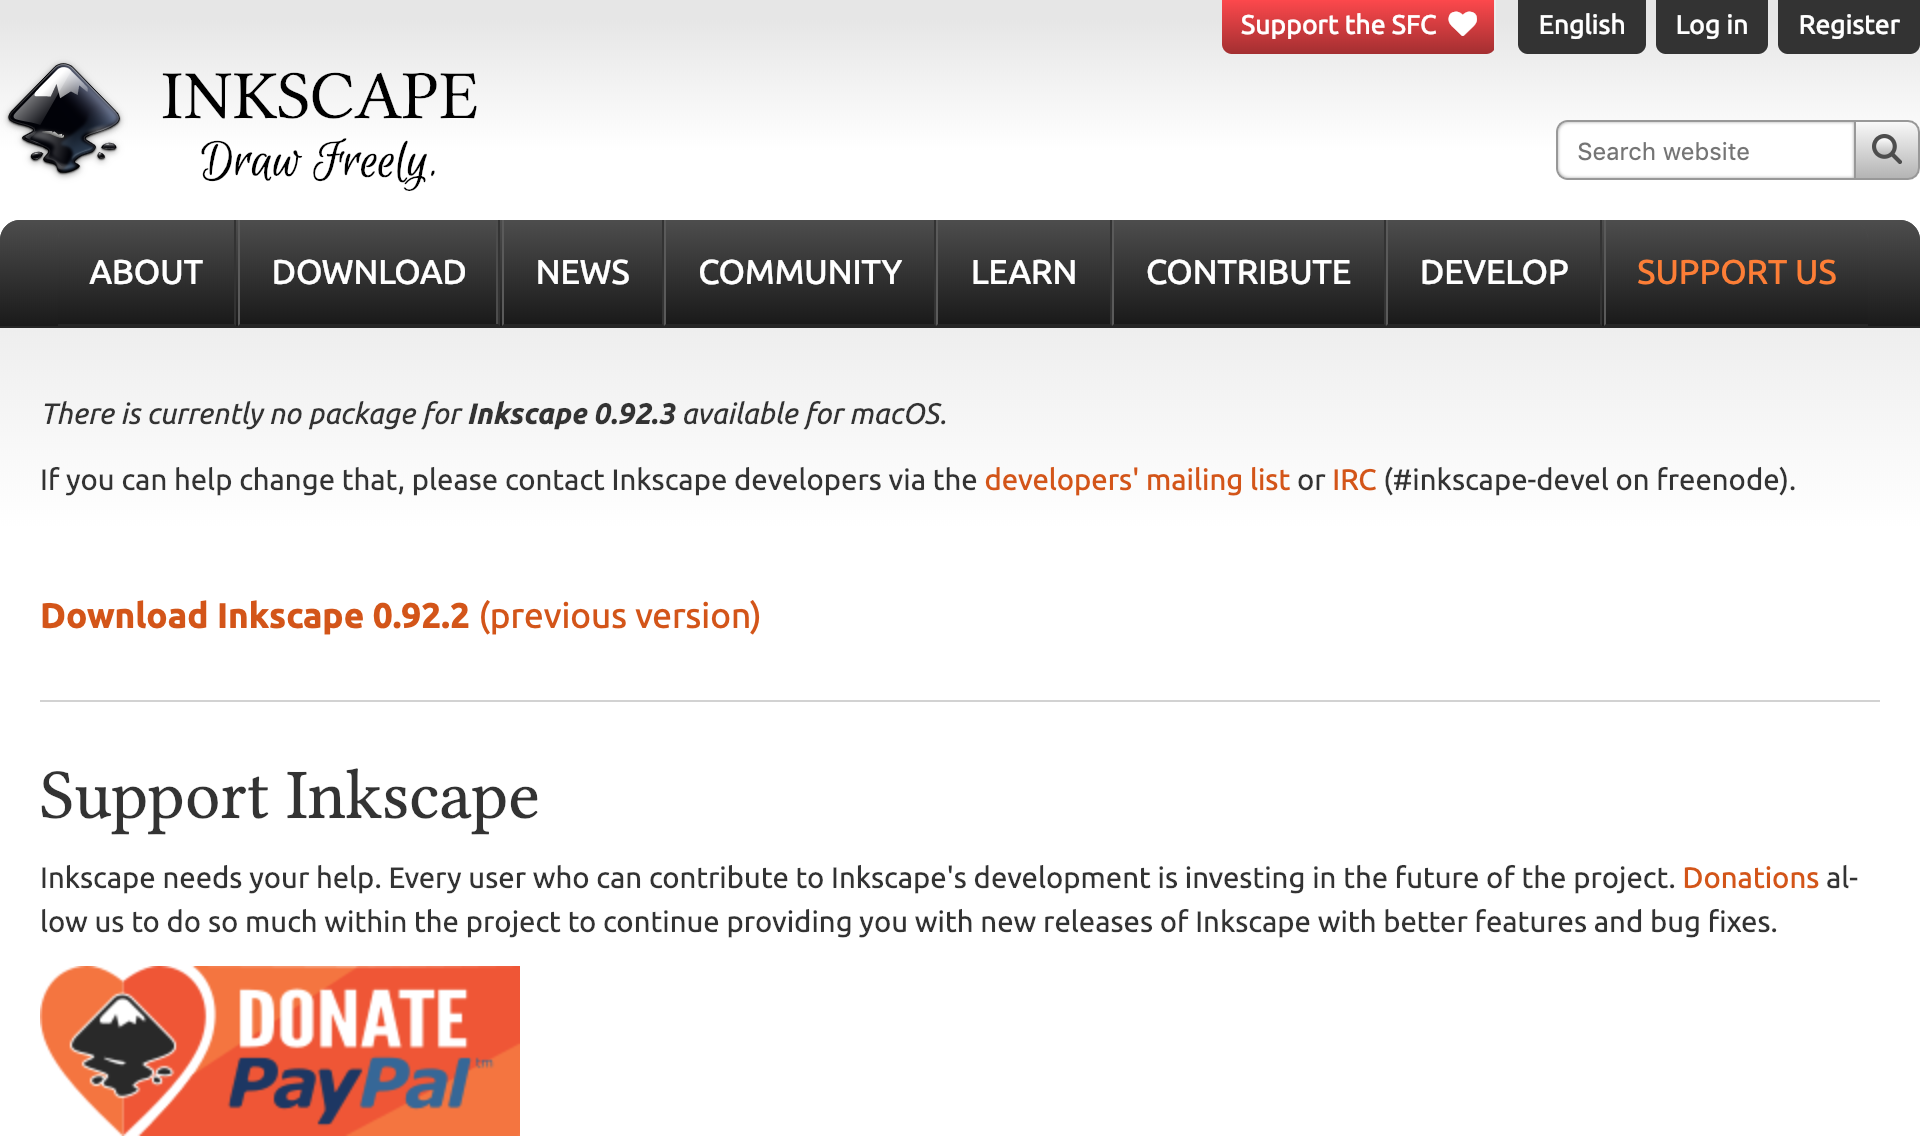
As of this writing, there is no package for the current version of Inkscape 0.92.3. Click on the latest available version (e.g. Download Inkscape 0.92.2 (previous version)).
You will be directed to a new page. Inkscape provides three install options:
Select the install option of your choice. We recommend using the latest Mac OS X 10.X Installer (xquartz) option. We run into some minor issues with the Build Inkscape on your Mac with Homebrew option, and have not tested the Build Inkscape on your Mac with MacPorts option.
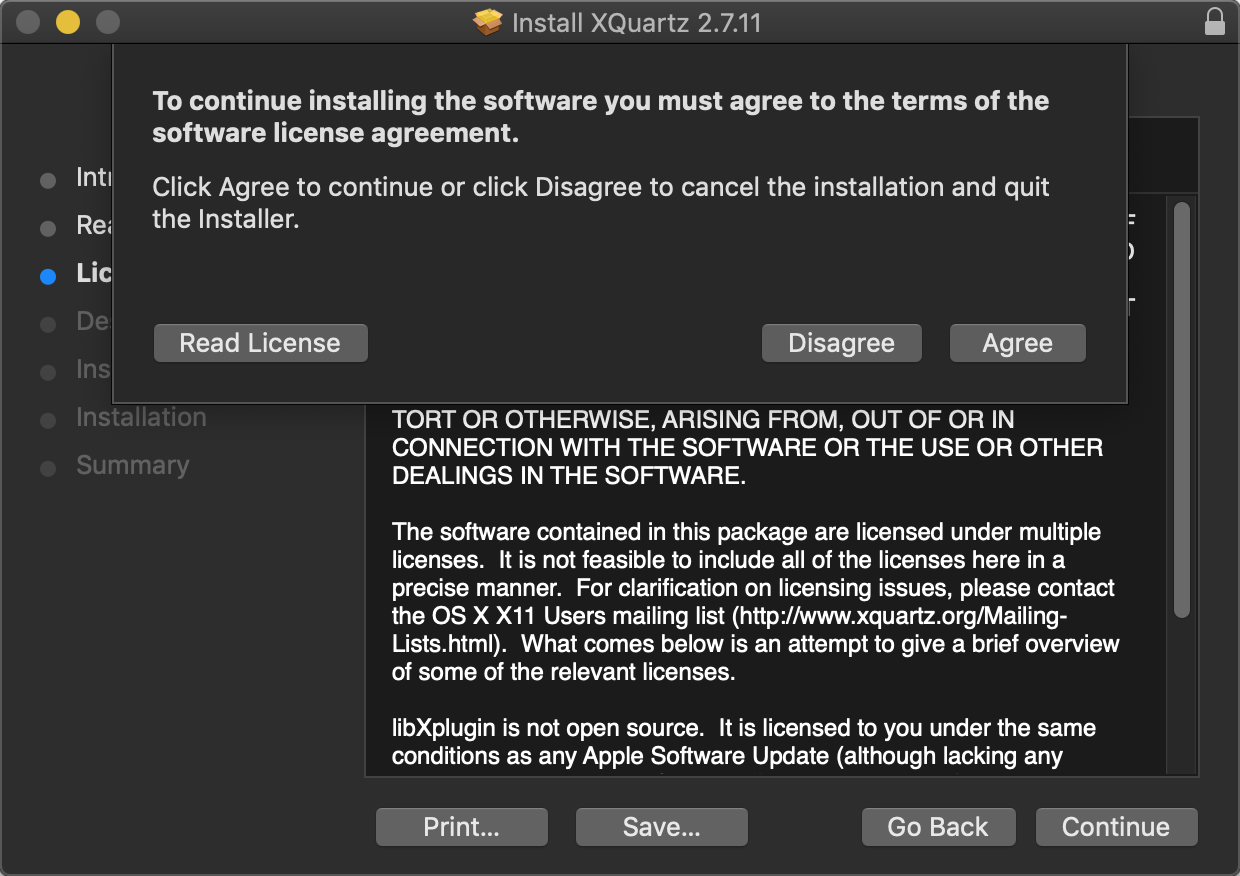
The following instructions are for the Mac OS X 10.7 Installer (xquartz) option.
Click on the Mac OS X 10.7 Installer (xquartz) dmg option.
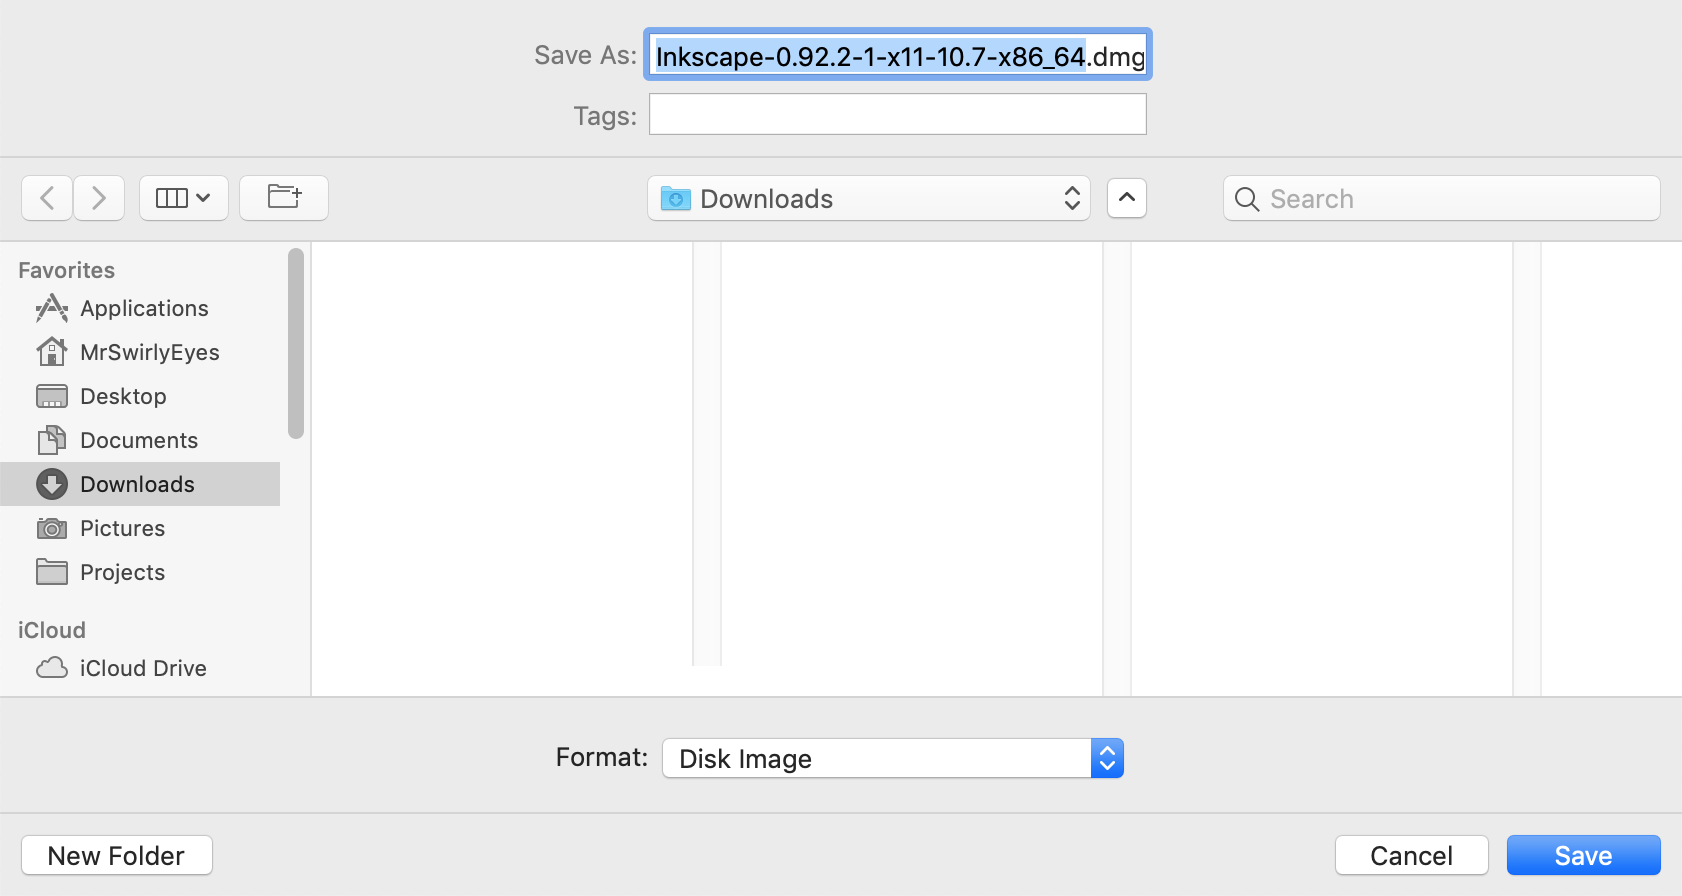
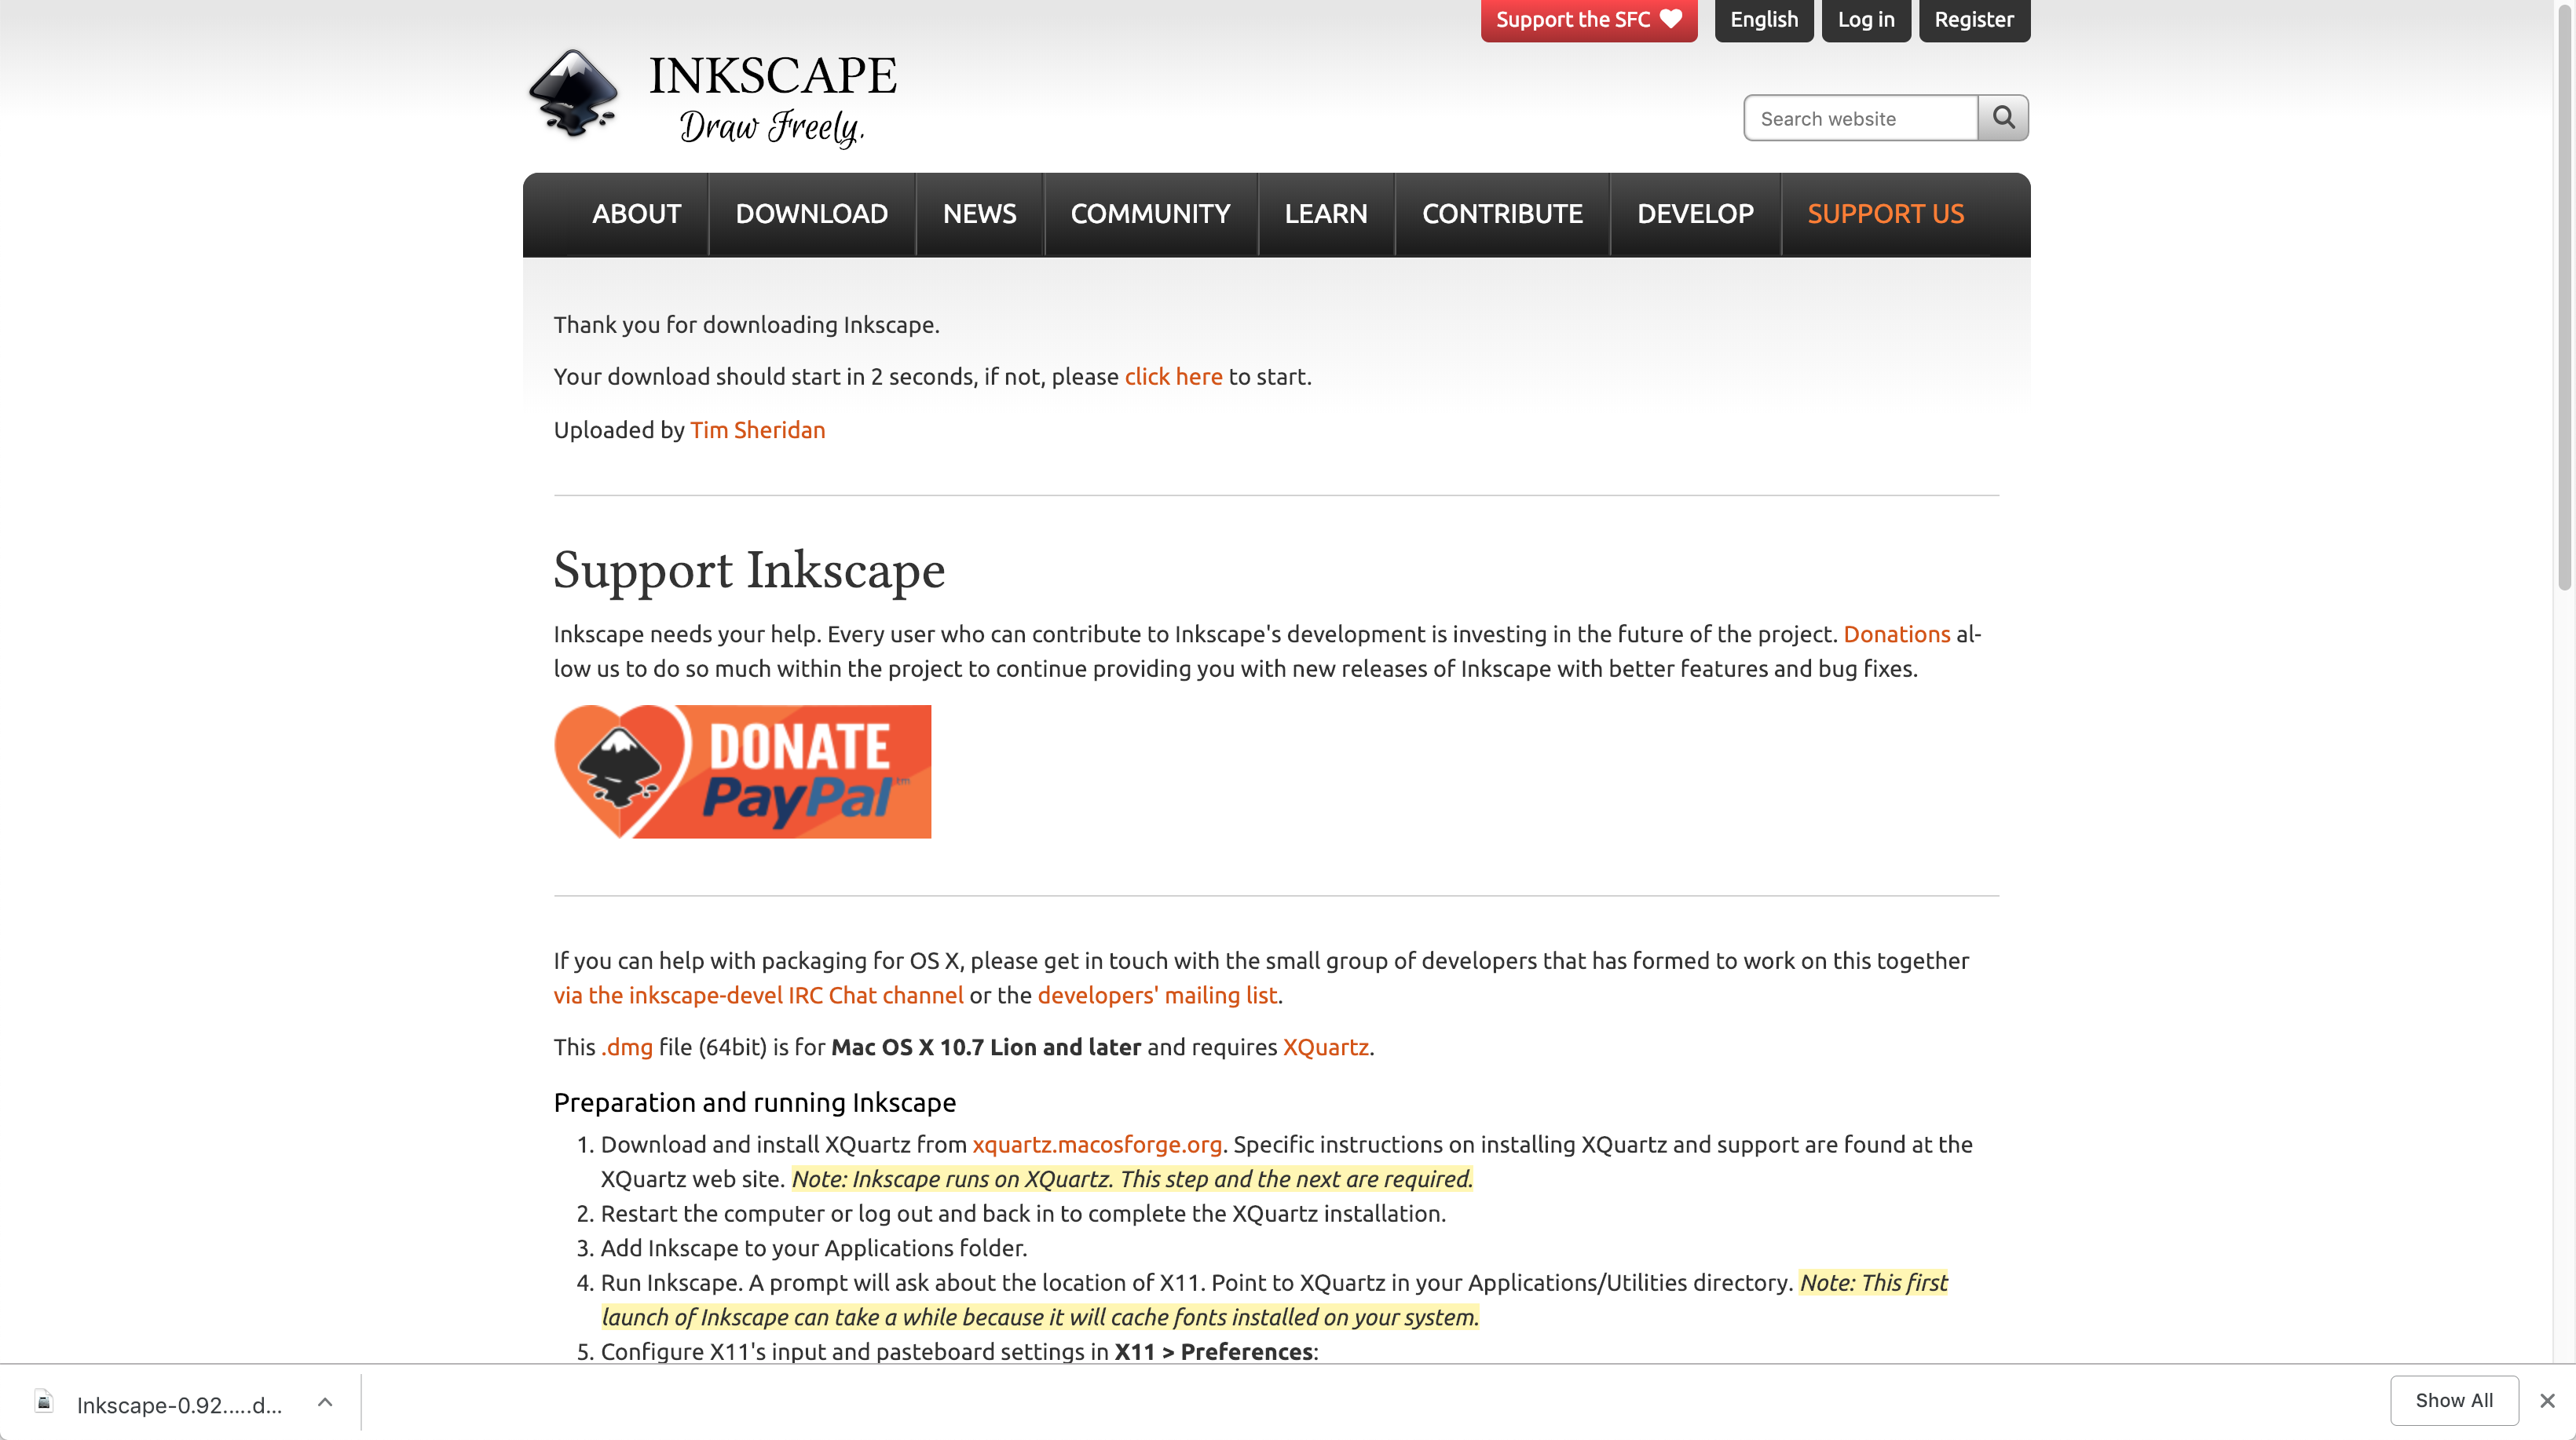
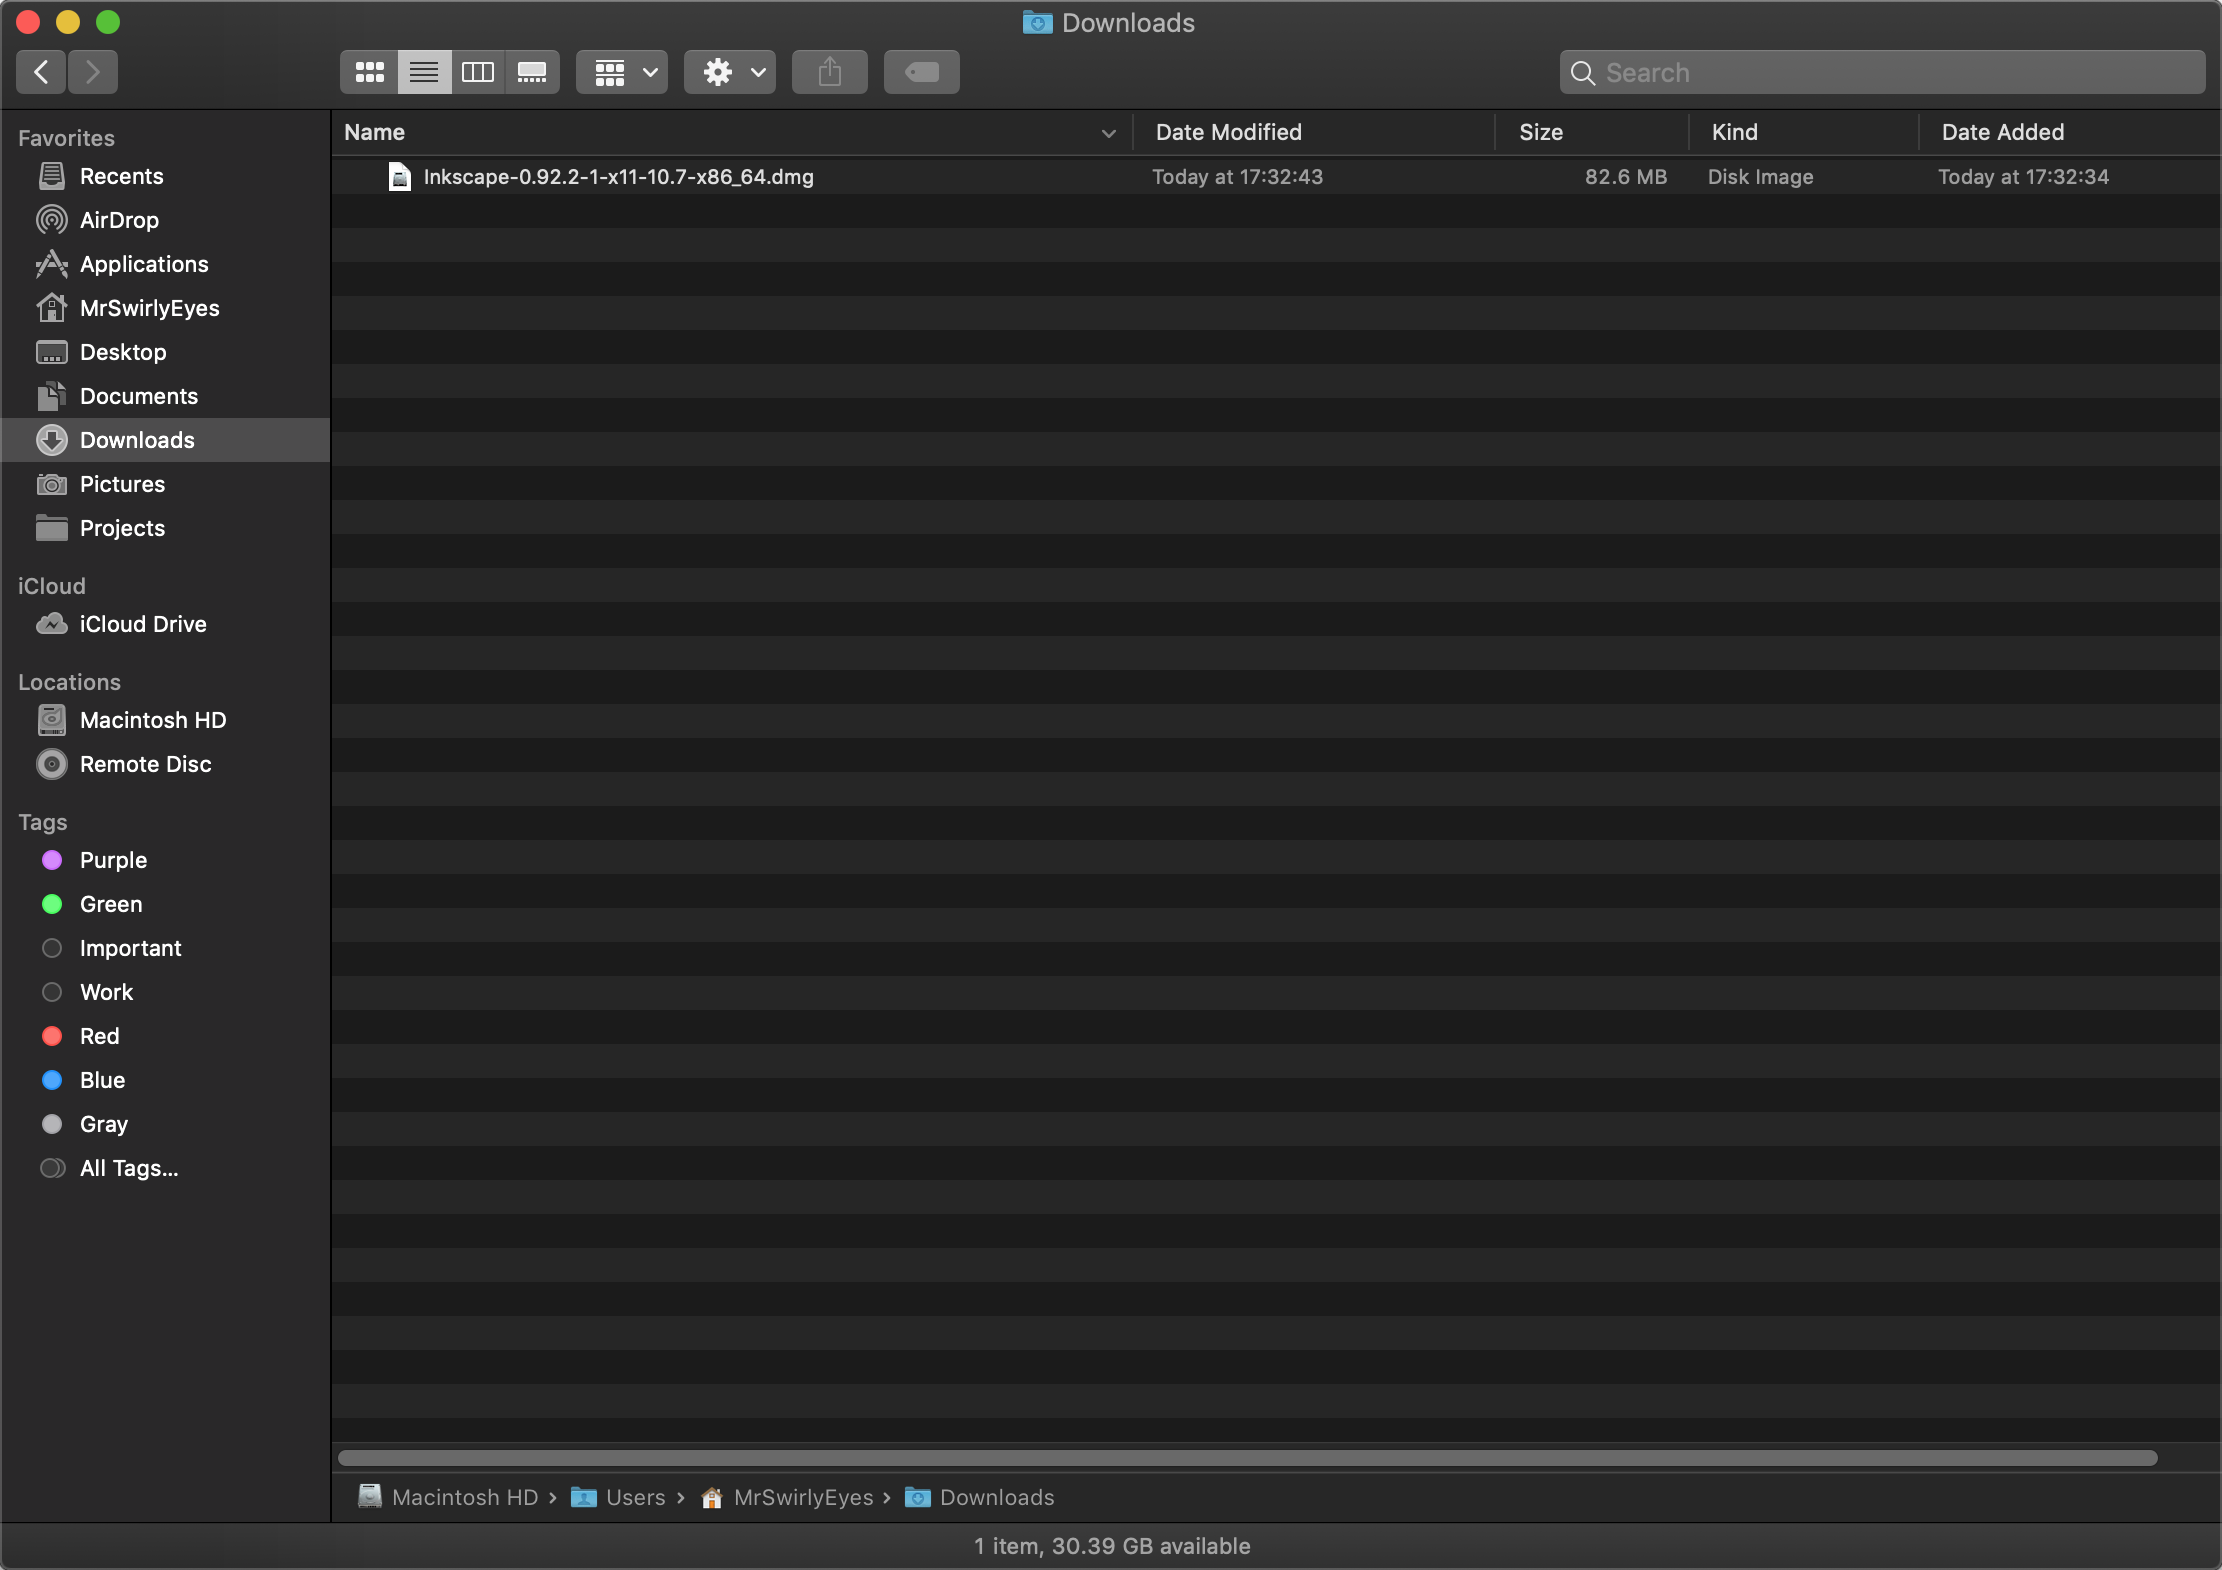
It will direct you to a new page. After a couple seconds, the download should automatically start. Save the .dmg anywhere on your device (e.g. Downloads).
If the download does not automatically start, you can click the click here near the top of the page.
We will not launch the Inkscape installer yet. First, we need to install XQuartz. XQuartz is required for Inkscape to run on Mac OS X with our installation method. Inkscape runs on top of XQuartz. (Kind of weird, but it is what it is).
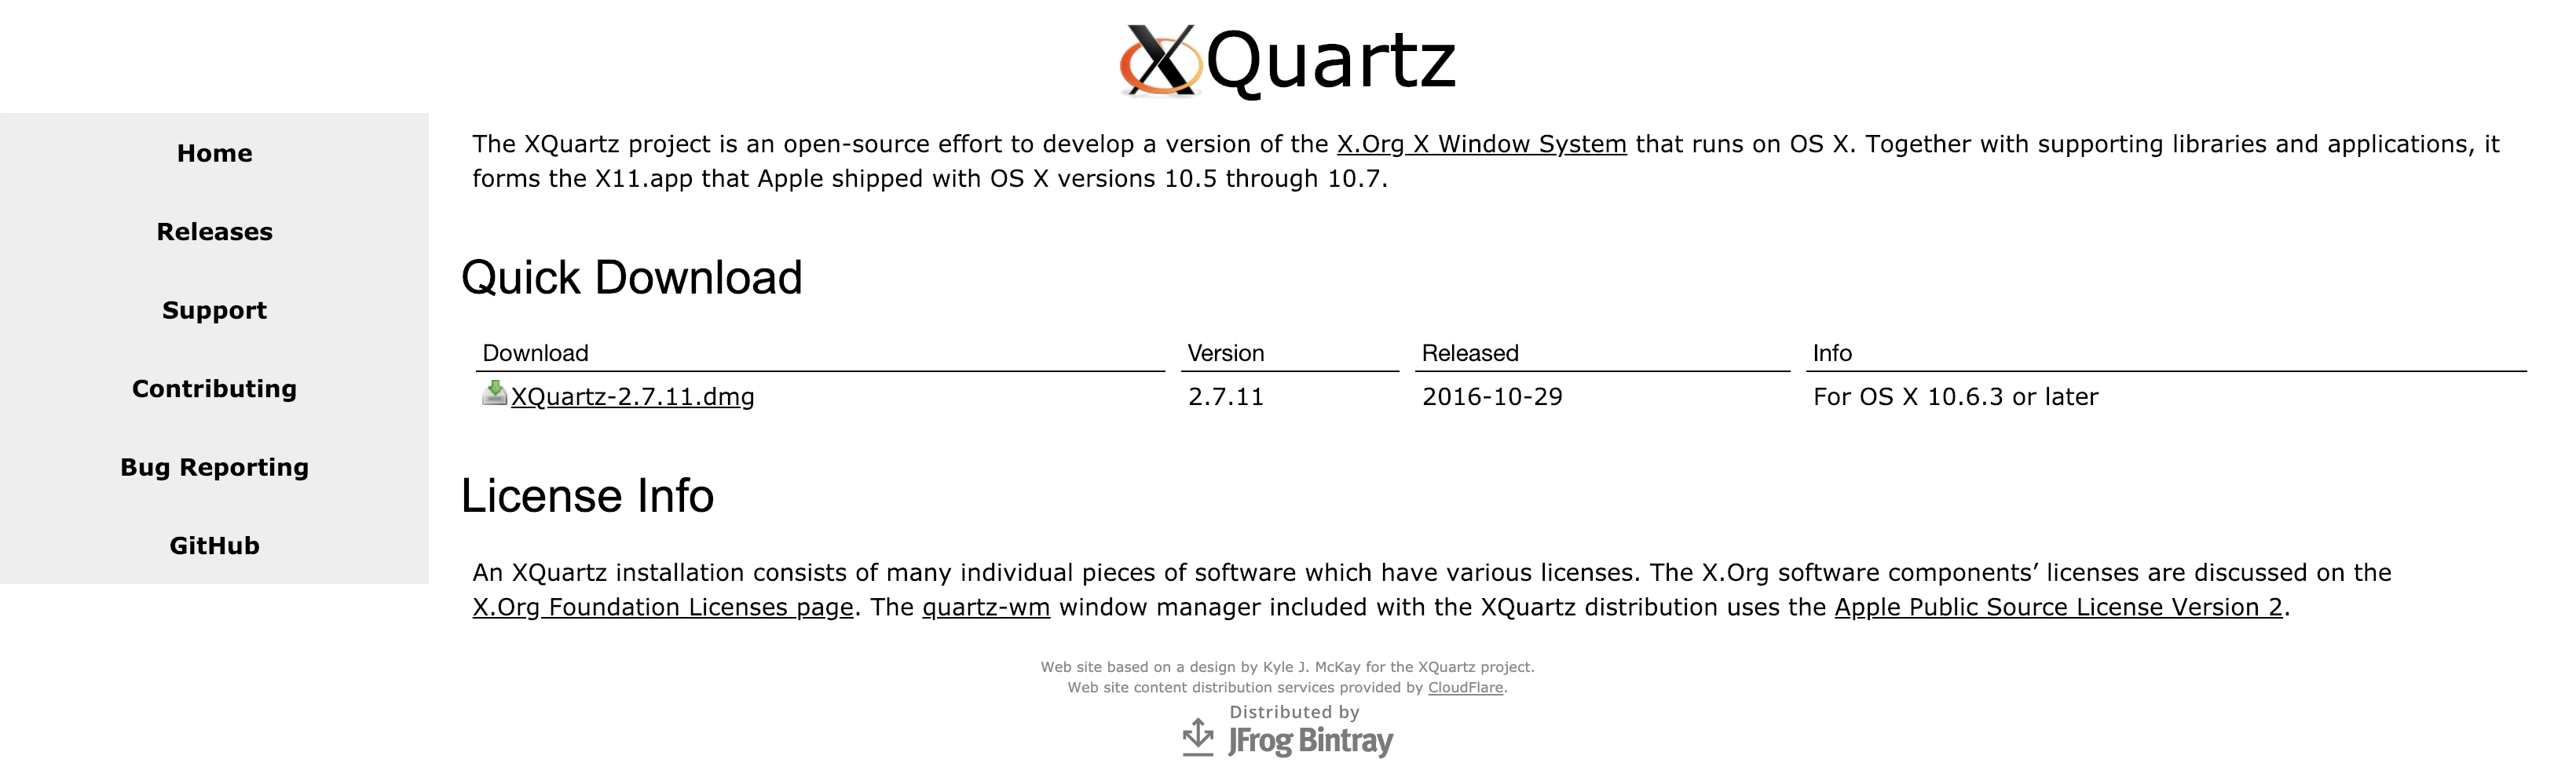
To install XQuartz navigate to the XQuartz homepage.
Click to download the latest version of XQuartz. At the time of this writing it is: v2.7.11.
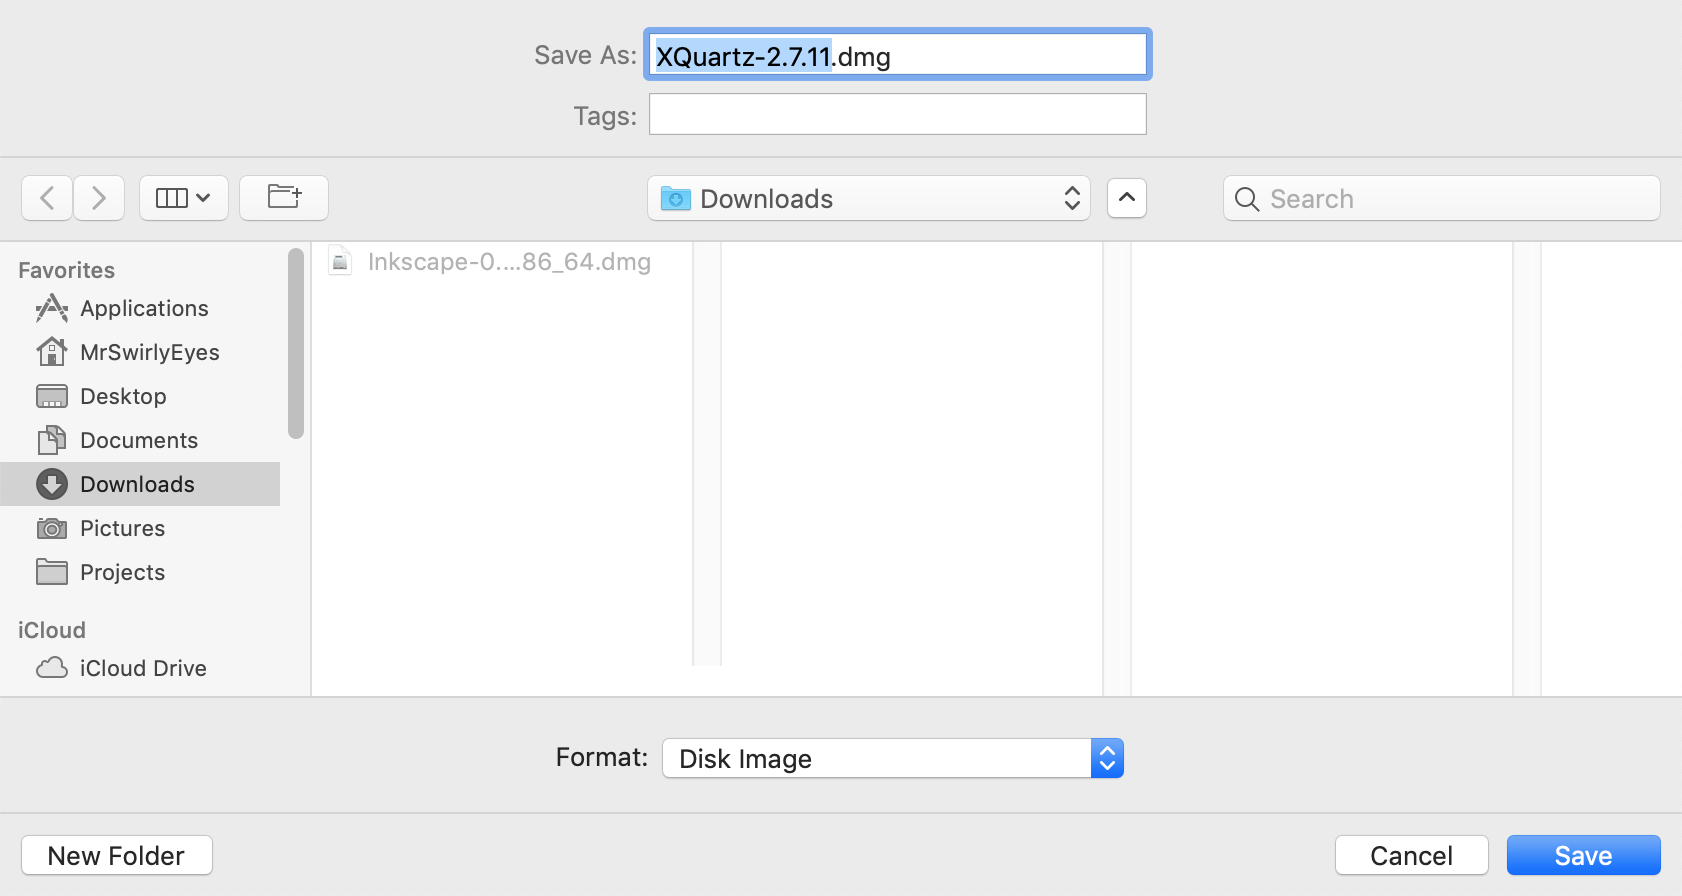
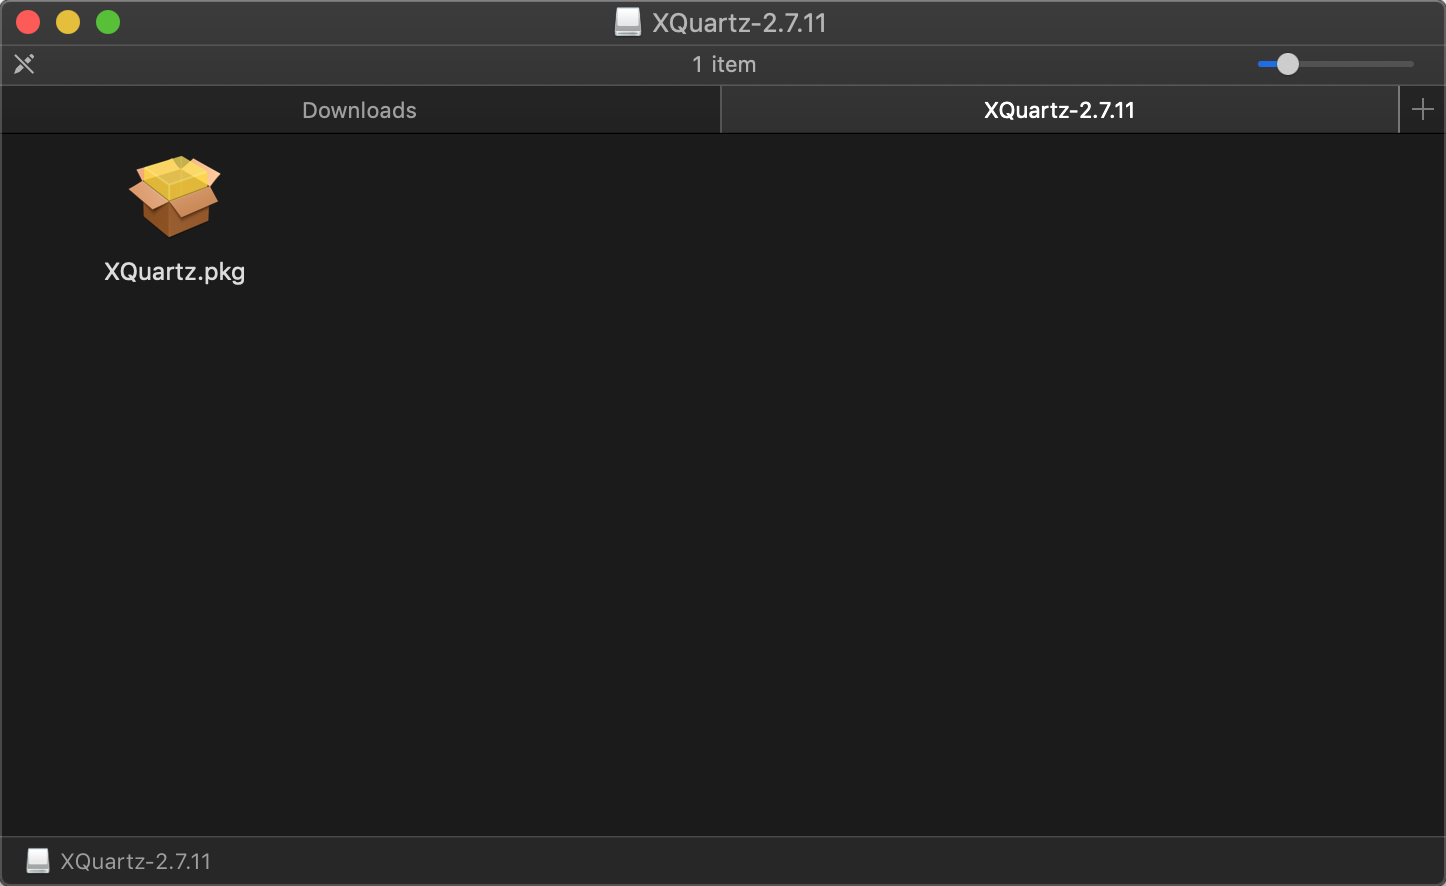
This should trigger the download. Save the .dmg anywhere on your device (e.g. Downloads).
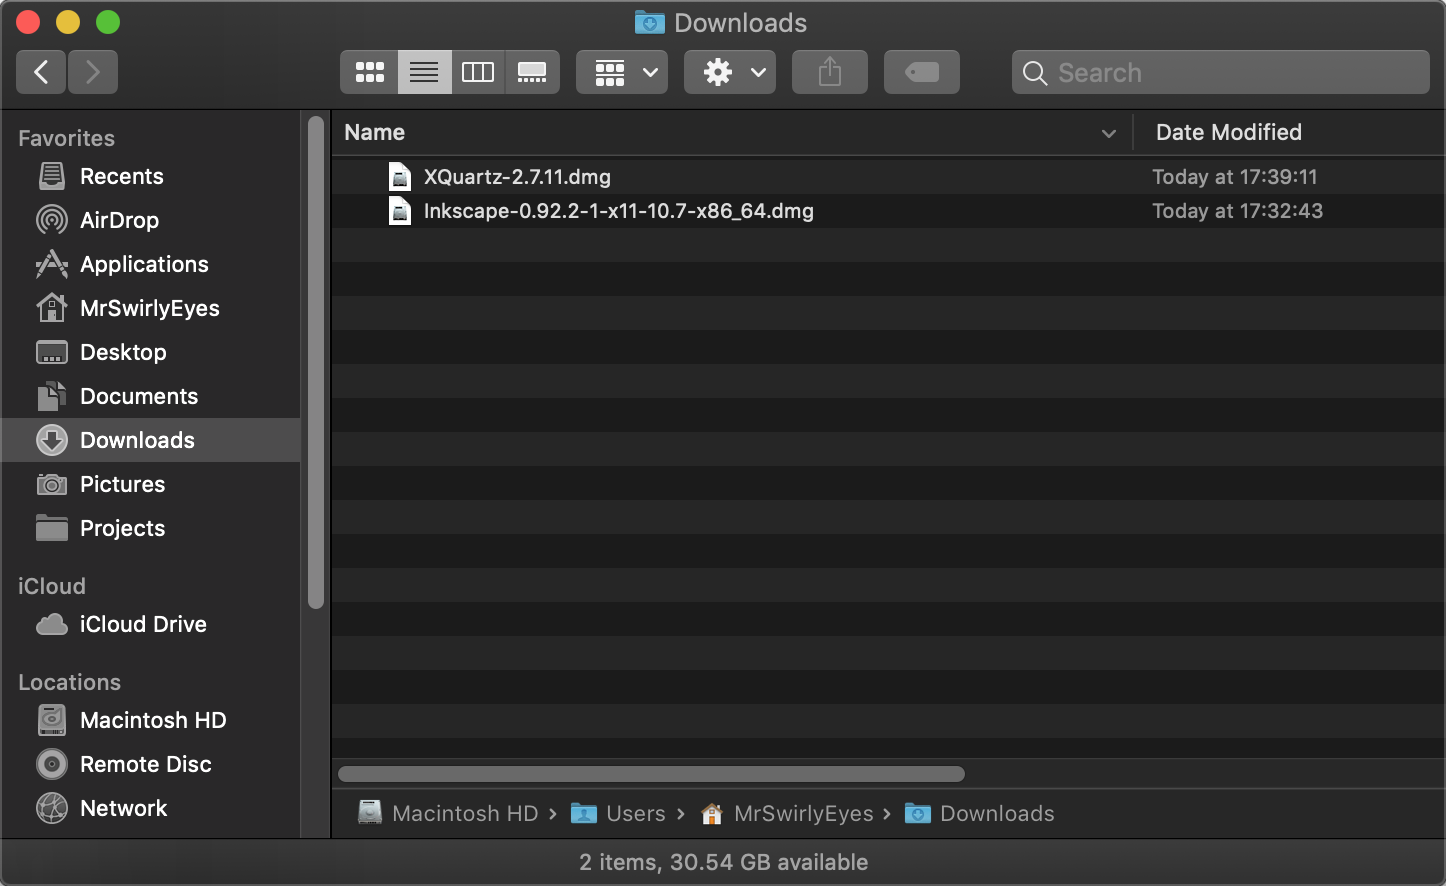
We need to install XQuartz before we install Inkscape. Launch the XQuartz .dmg.
Double click on the XQuartz.pkg to begin the installer.
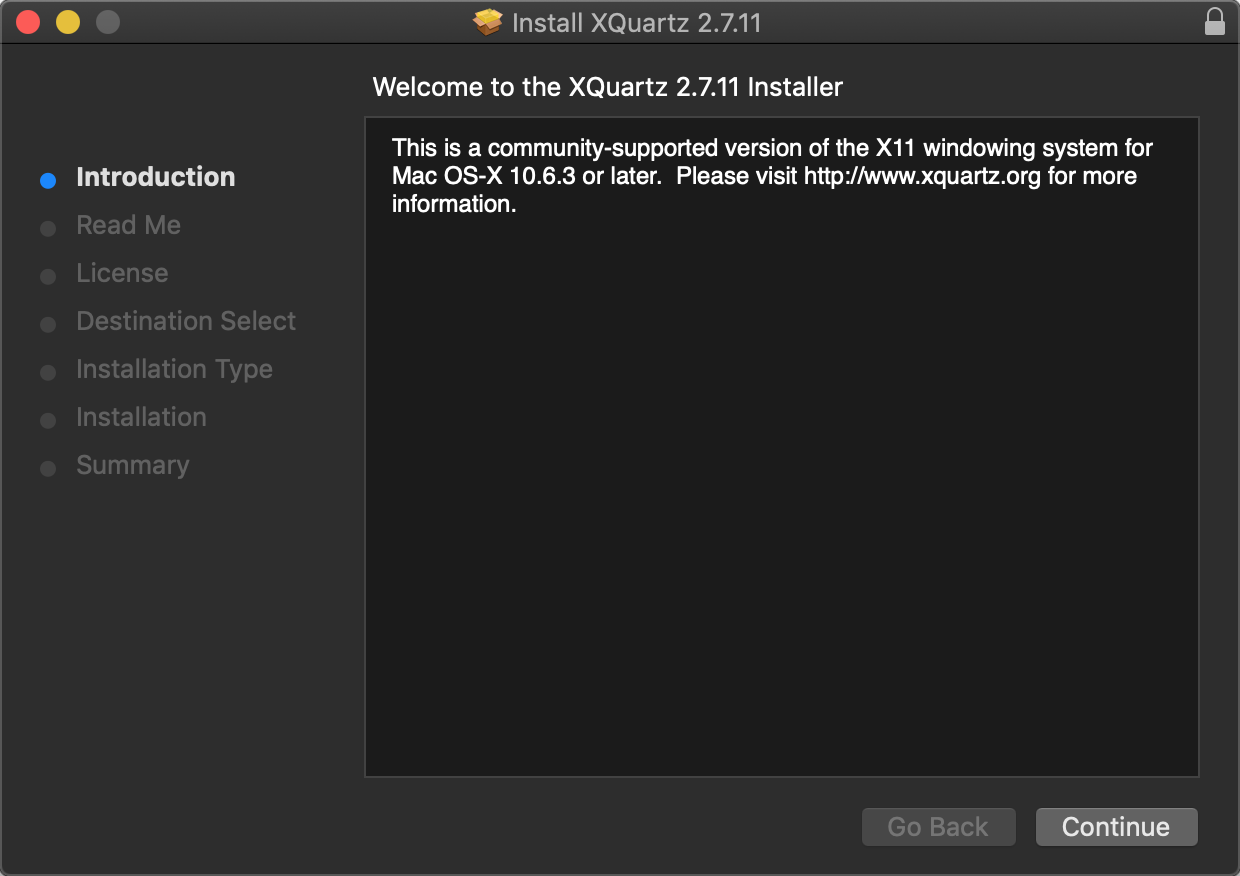
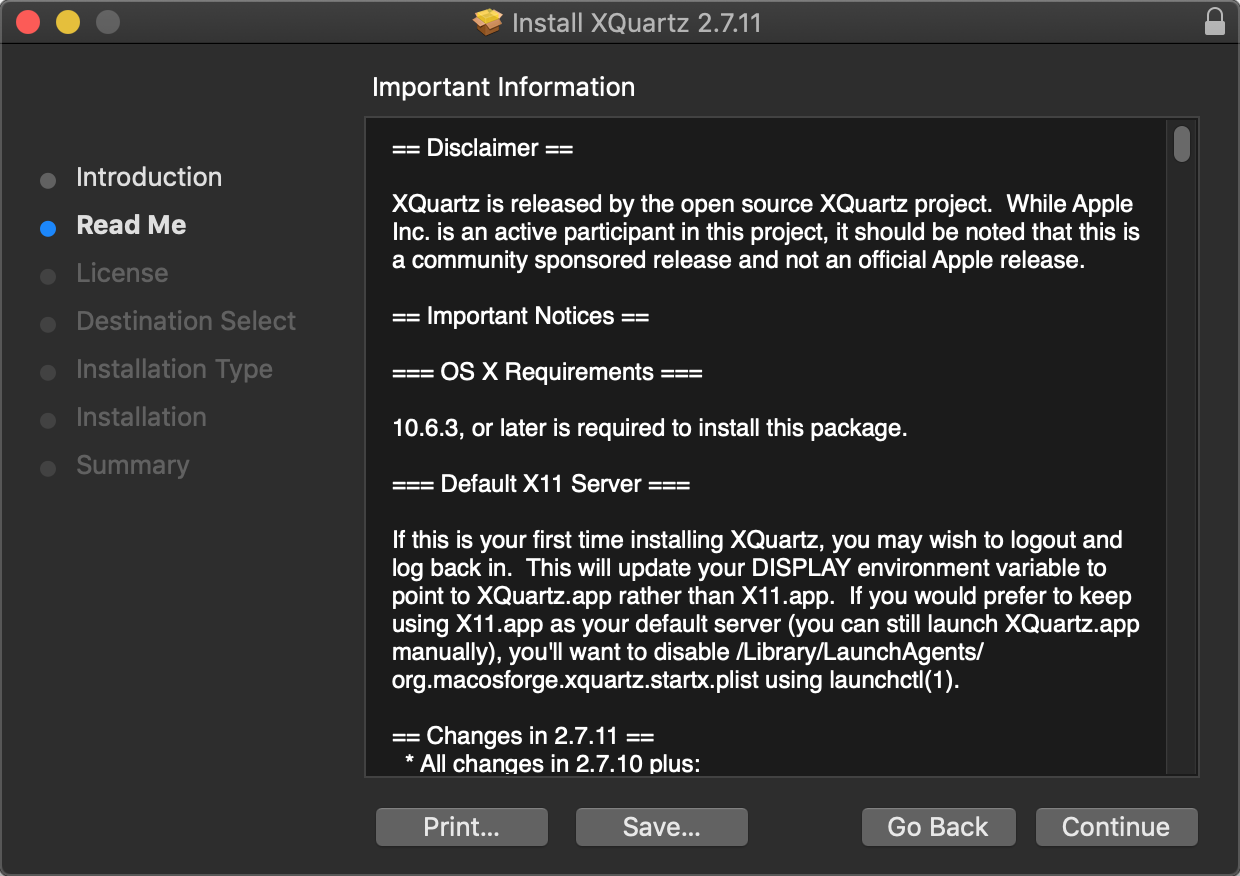
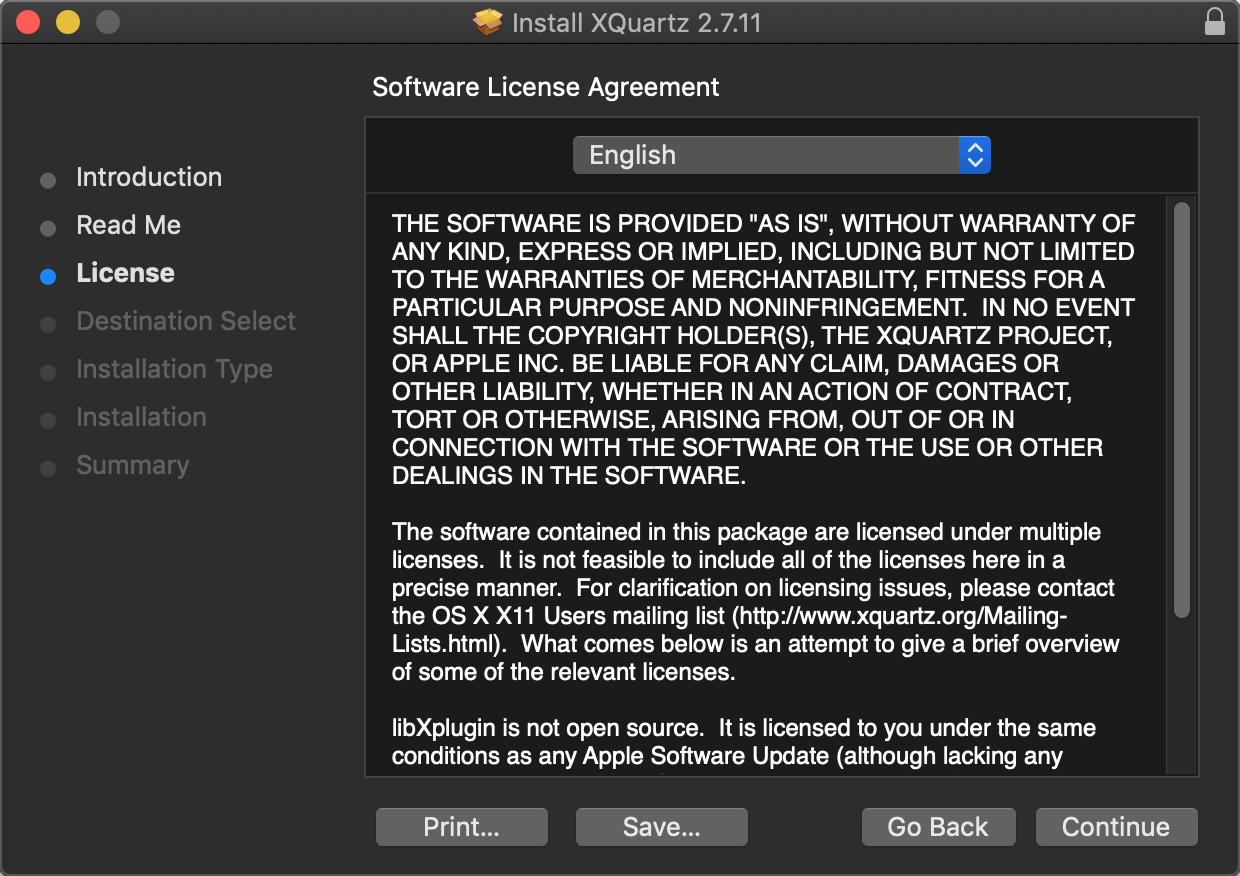
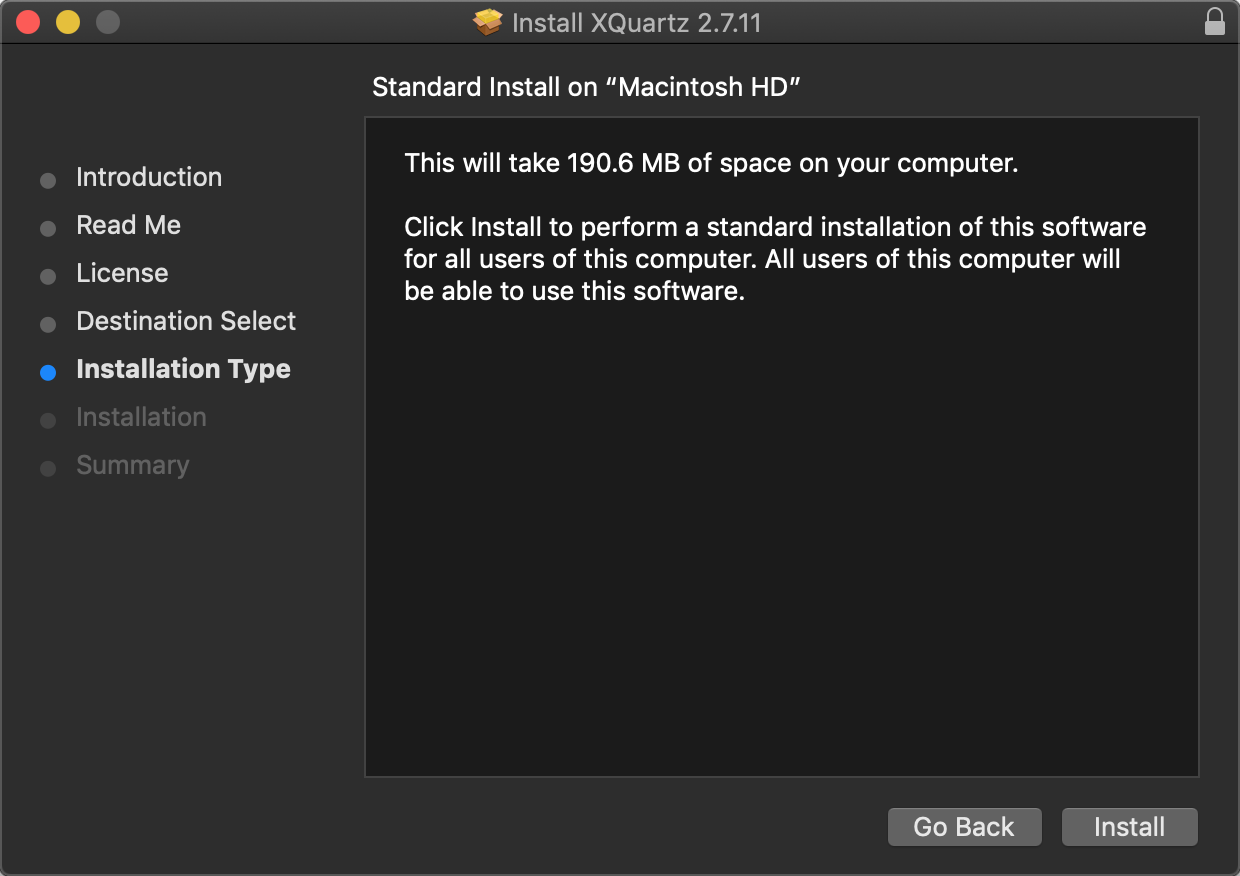
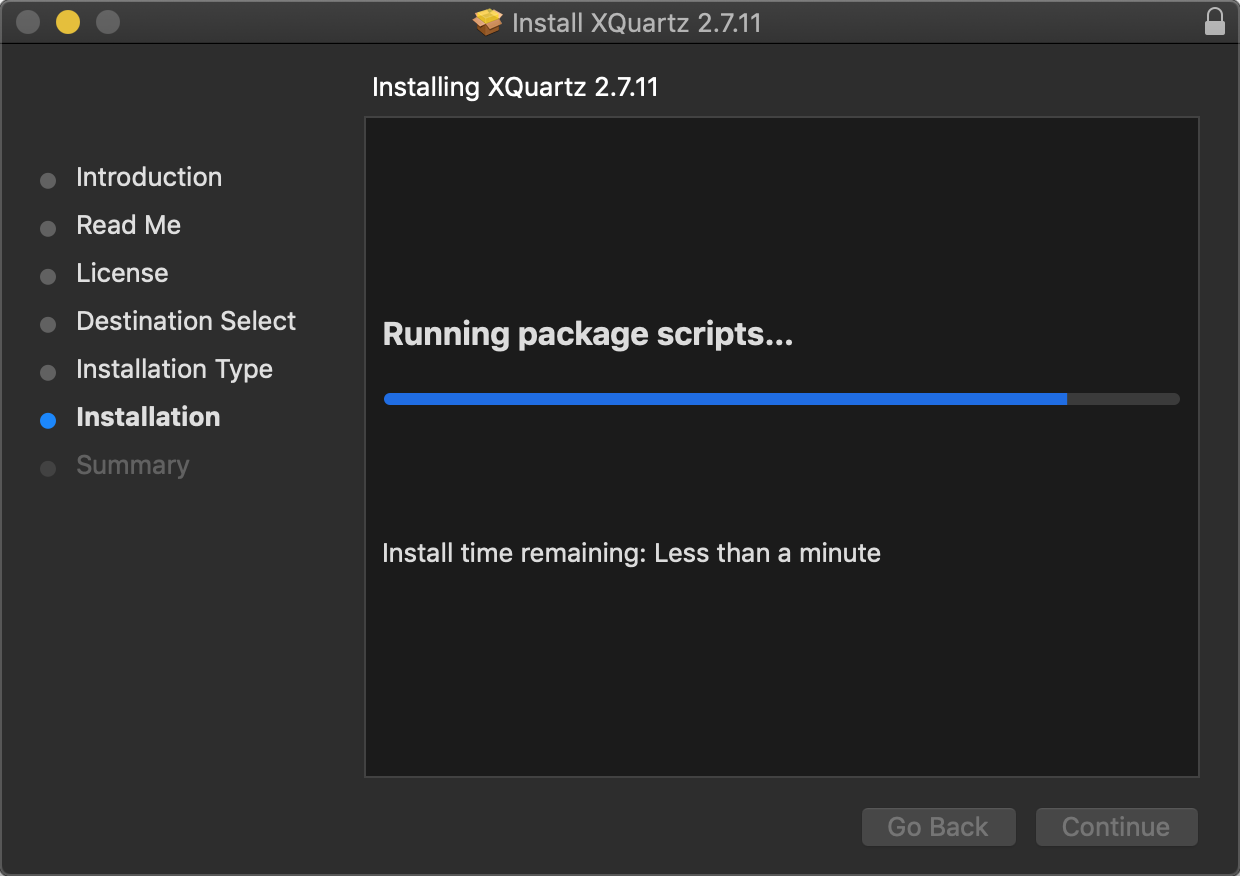
Follow the next few stages to complete the installation:
Click to install XQuartz. You may need to provide an administrative password to give the installer permission.
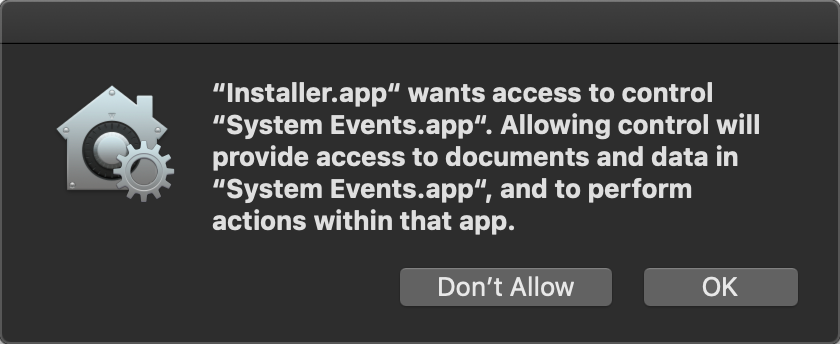
You may get one more request for XQuartz for permission to access your system.
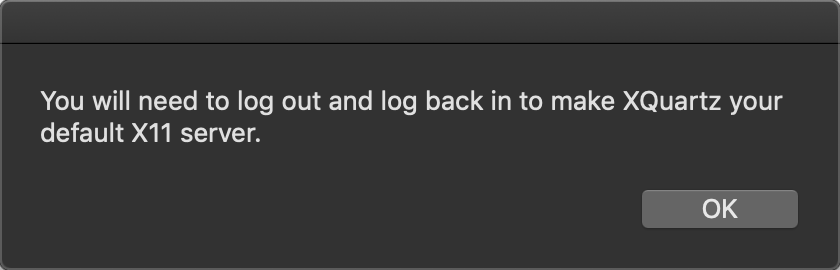
The installer will flag you to log in and out (or restart) your device. (We will do this shortly)
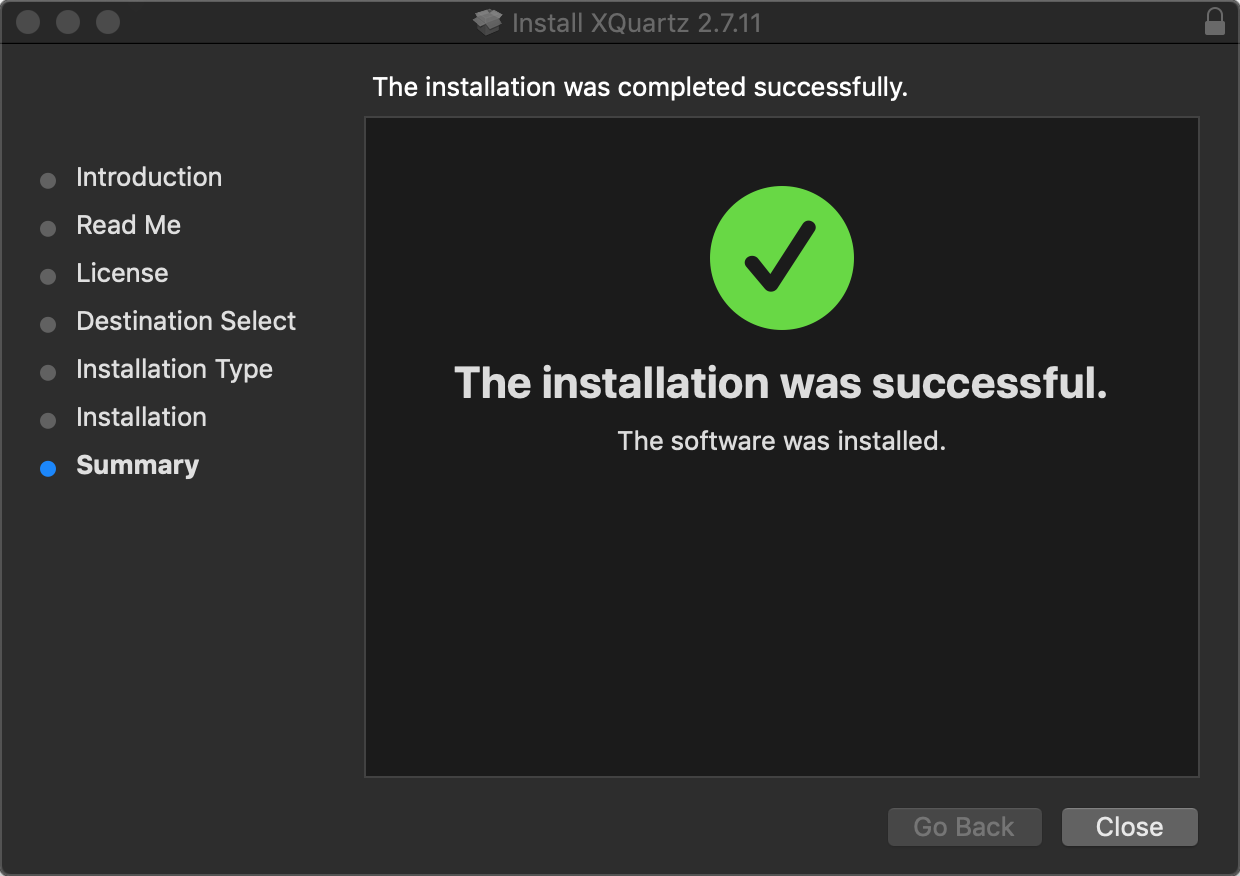
Finally, the installation should complete.
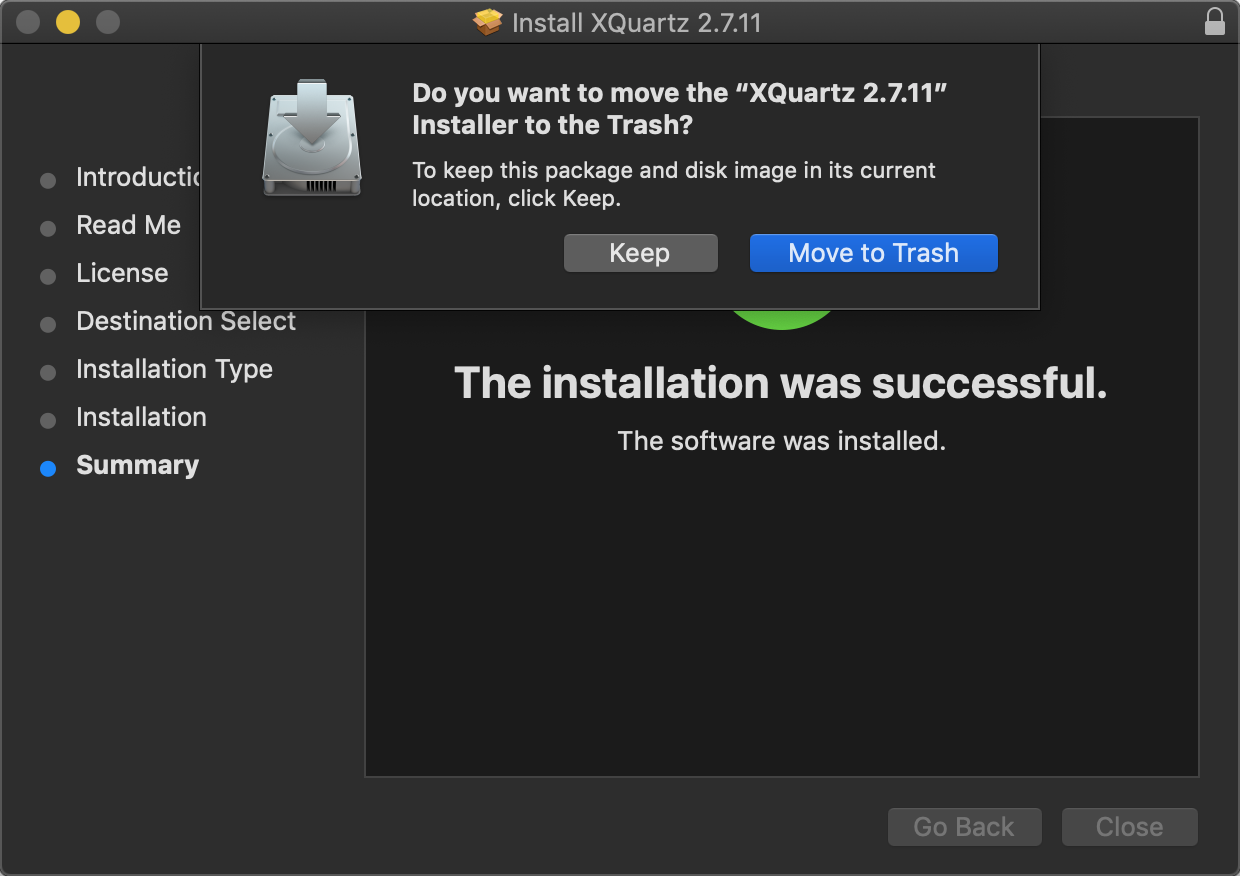
Clicking close on the installer will prompt you to move the installer to the trash.
Finally, XQuartz is installed. Before installing Inkscape, restart your device.
With XQuartz installed, we are ready to install Inkscape.
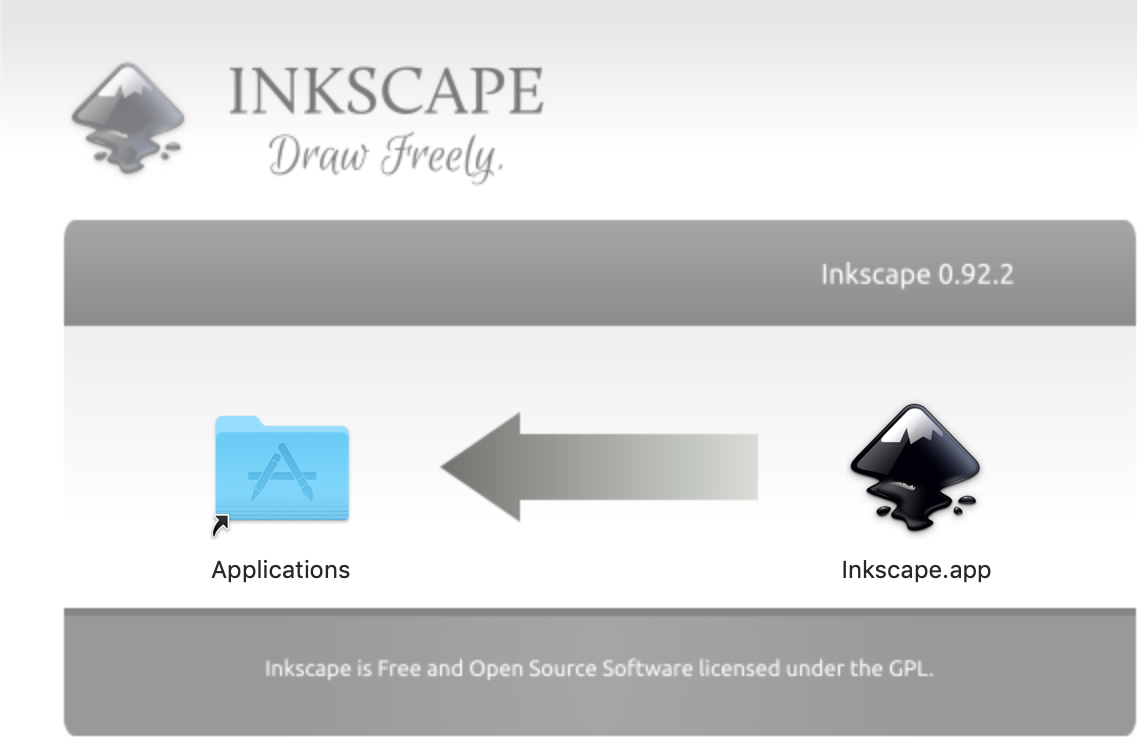
Launch the Inkscape .dmg.
Drag the Inkscape.app into your Applications folder to install Inkscape.
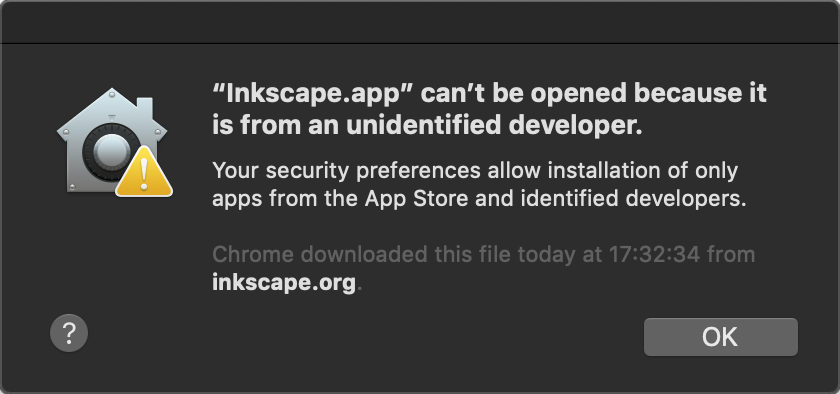
Navigate to Applications, or use the Spotlight search, and launch the Inkscape app.
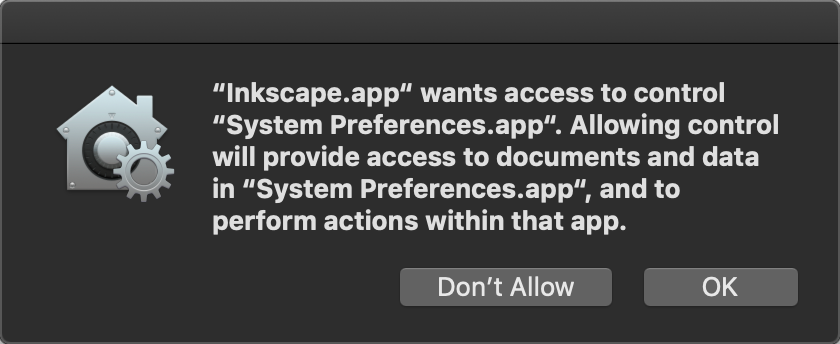
You may get a security flag saying that Apple does not recognize this developer.
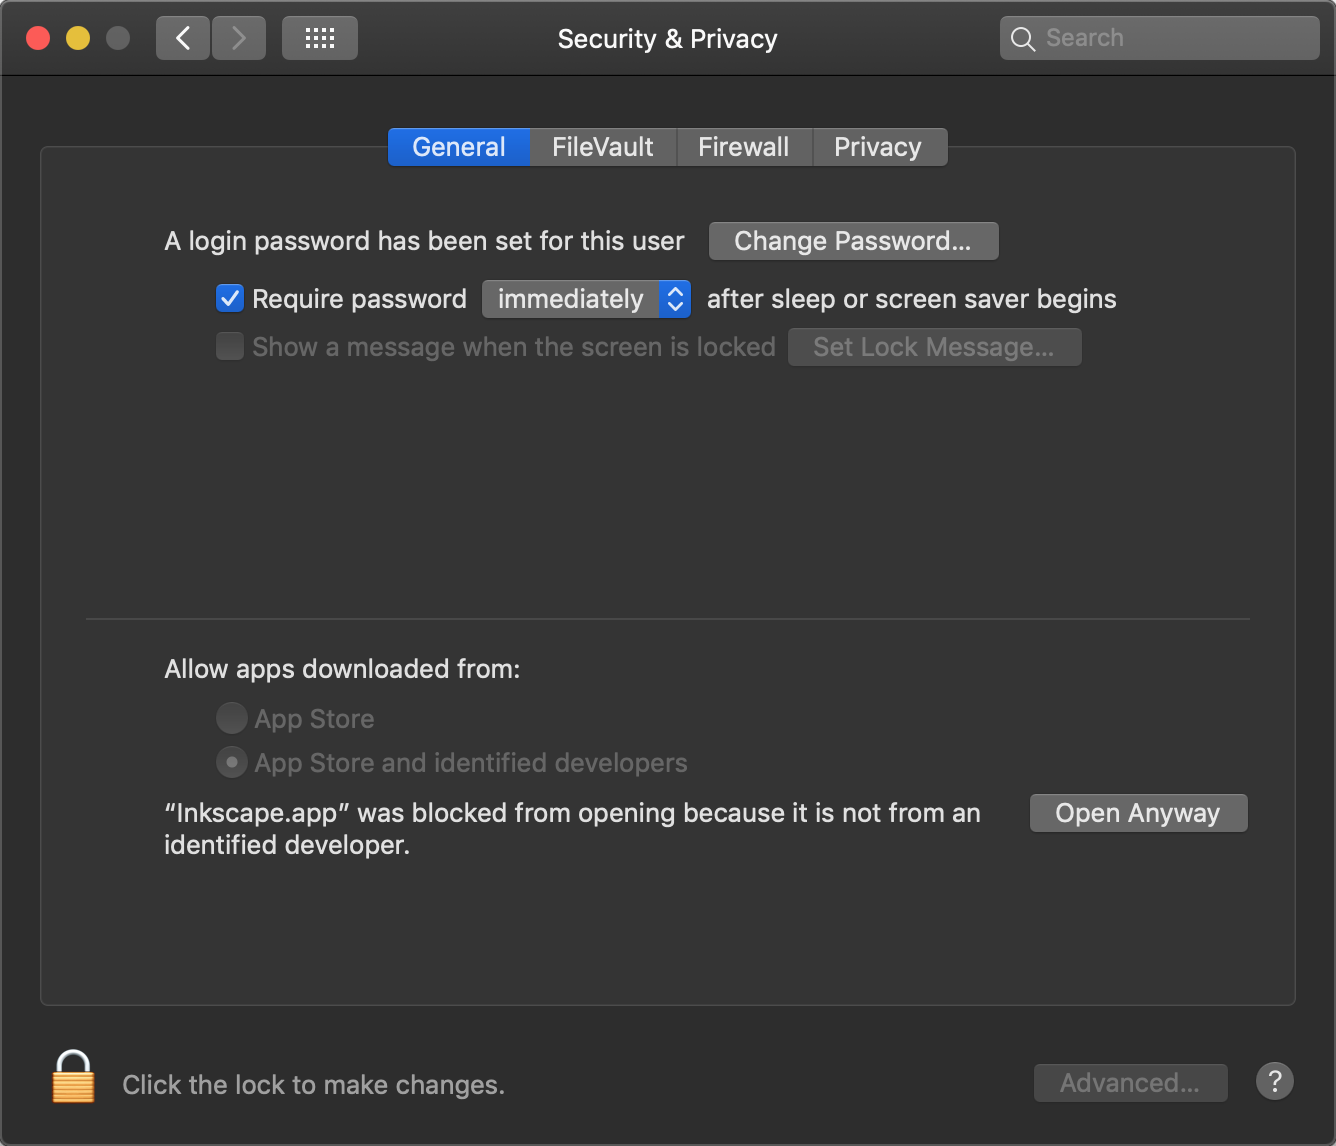
Launch the System Preferences using the Spotlight search, or navigating the Apple icon > System Preferences.
Click on Security and Privacy. Click on the General tab (if it is not currently navigated to it).
Toward the bottom half of the window it says "Inkscape.app" was blocked from opening because it is not from an identified developer, click on Open Anyway.
You may need to provide an administrative password to give the installer permission.
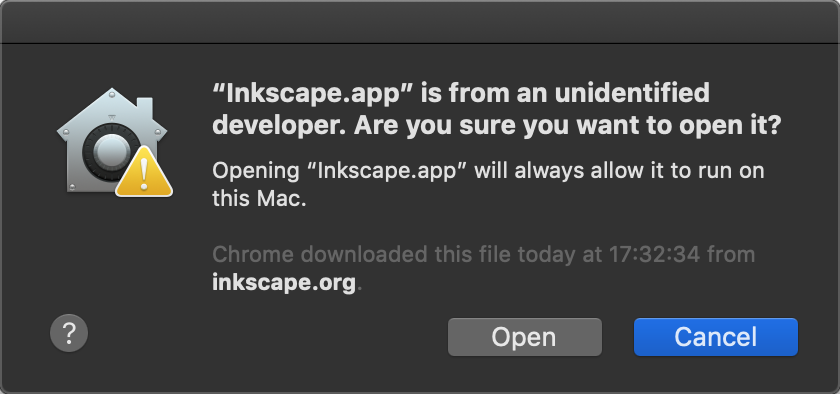
Once again, it will remind you that Apple does not recognize this developer, however we can now proceed.
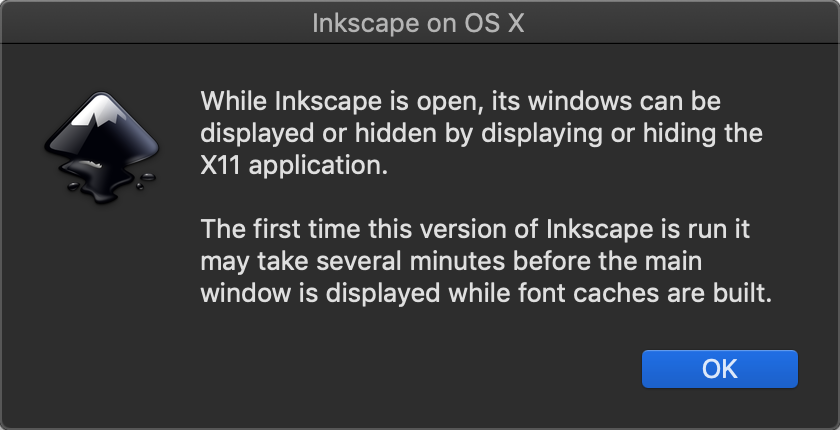
Inkscape will request permission to access your system.
You will get one last message from Inkscape saying that when you run Inkscape, XQuartz will also run. And that the first time the app is run - which is right now - it may take a minute to launch.
Finally, Inkscape will launch! Technically we are good to go, but we will tune a few settings for XQuartz and Inkscape.
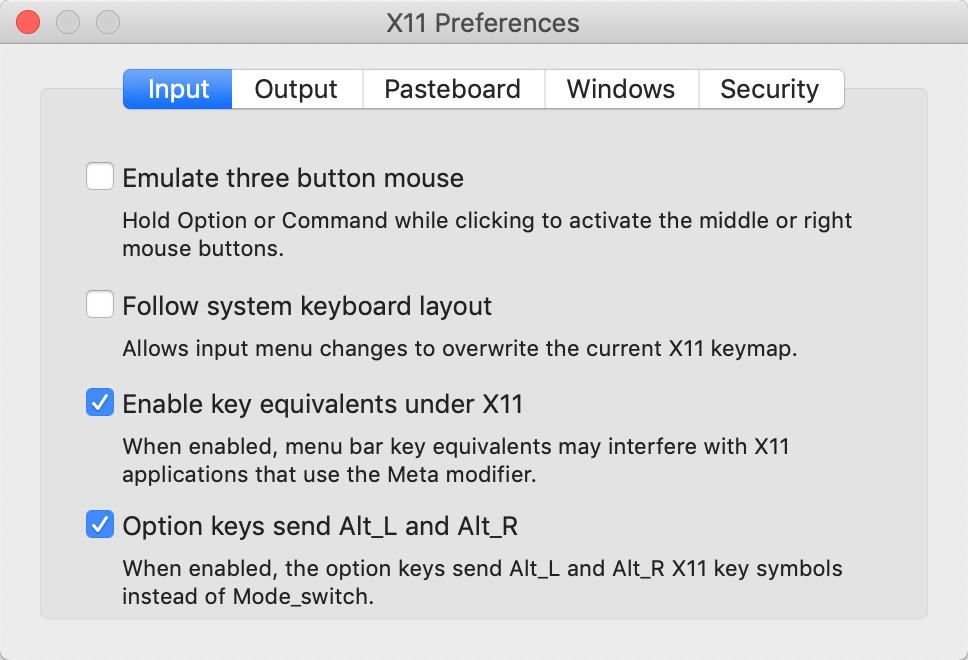
Navigate to the toolbar and click XQuartz > Preferences.
Click on the Input tab and match the checkboxes to the following:
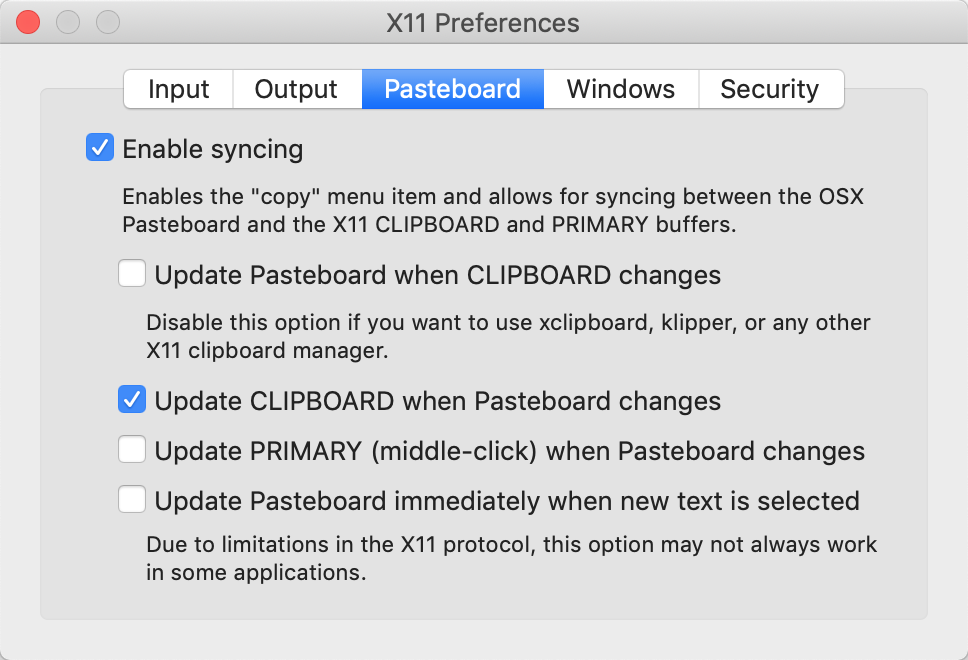
Then, click on the Pasteboard tab and match the checkboxes to the following:
You can close the Preferences window. And you are good to go working with Inkscape!
todo
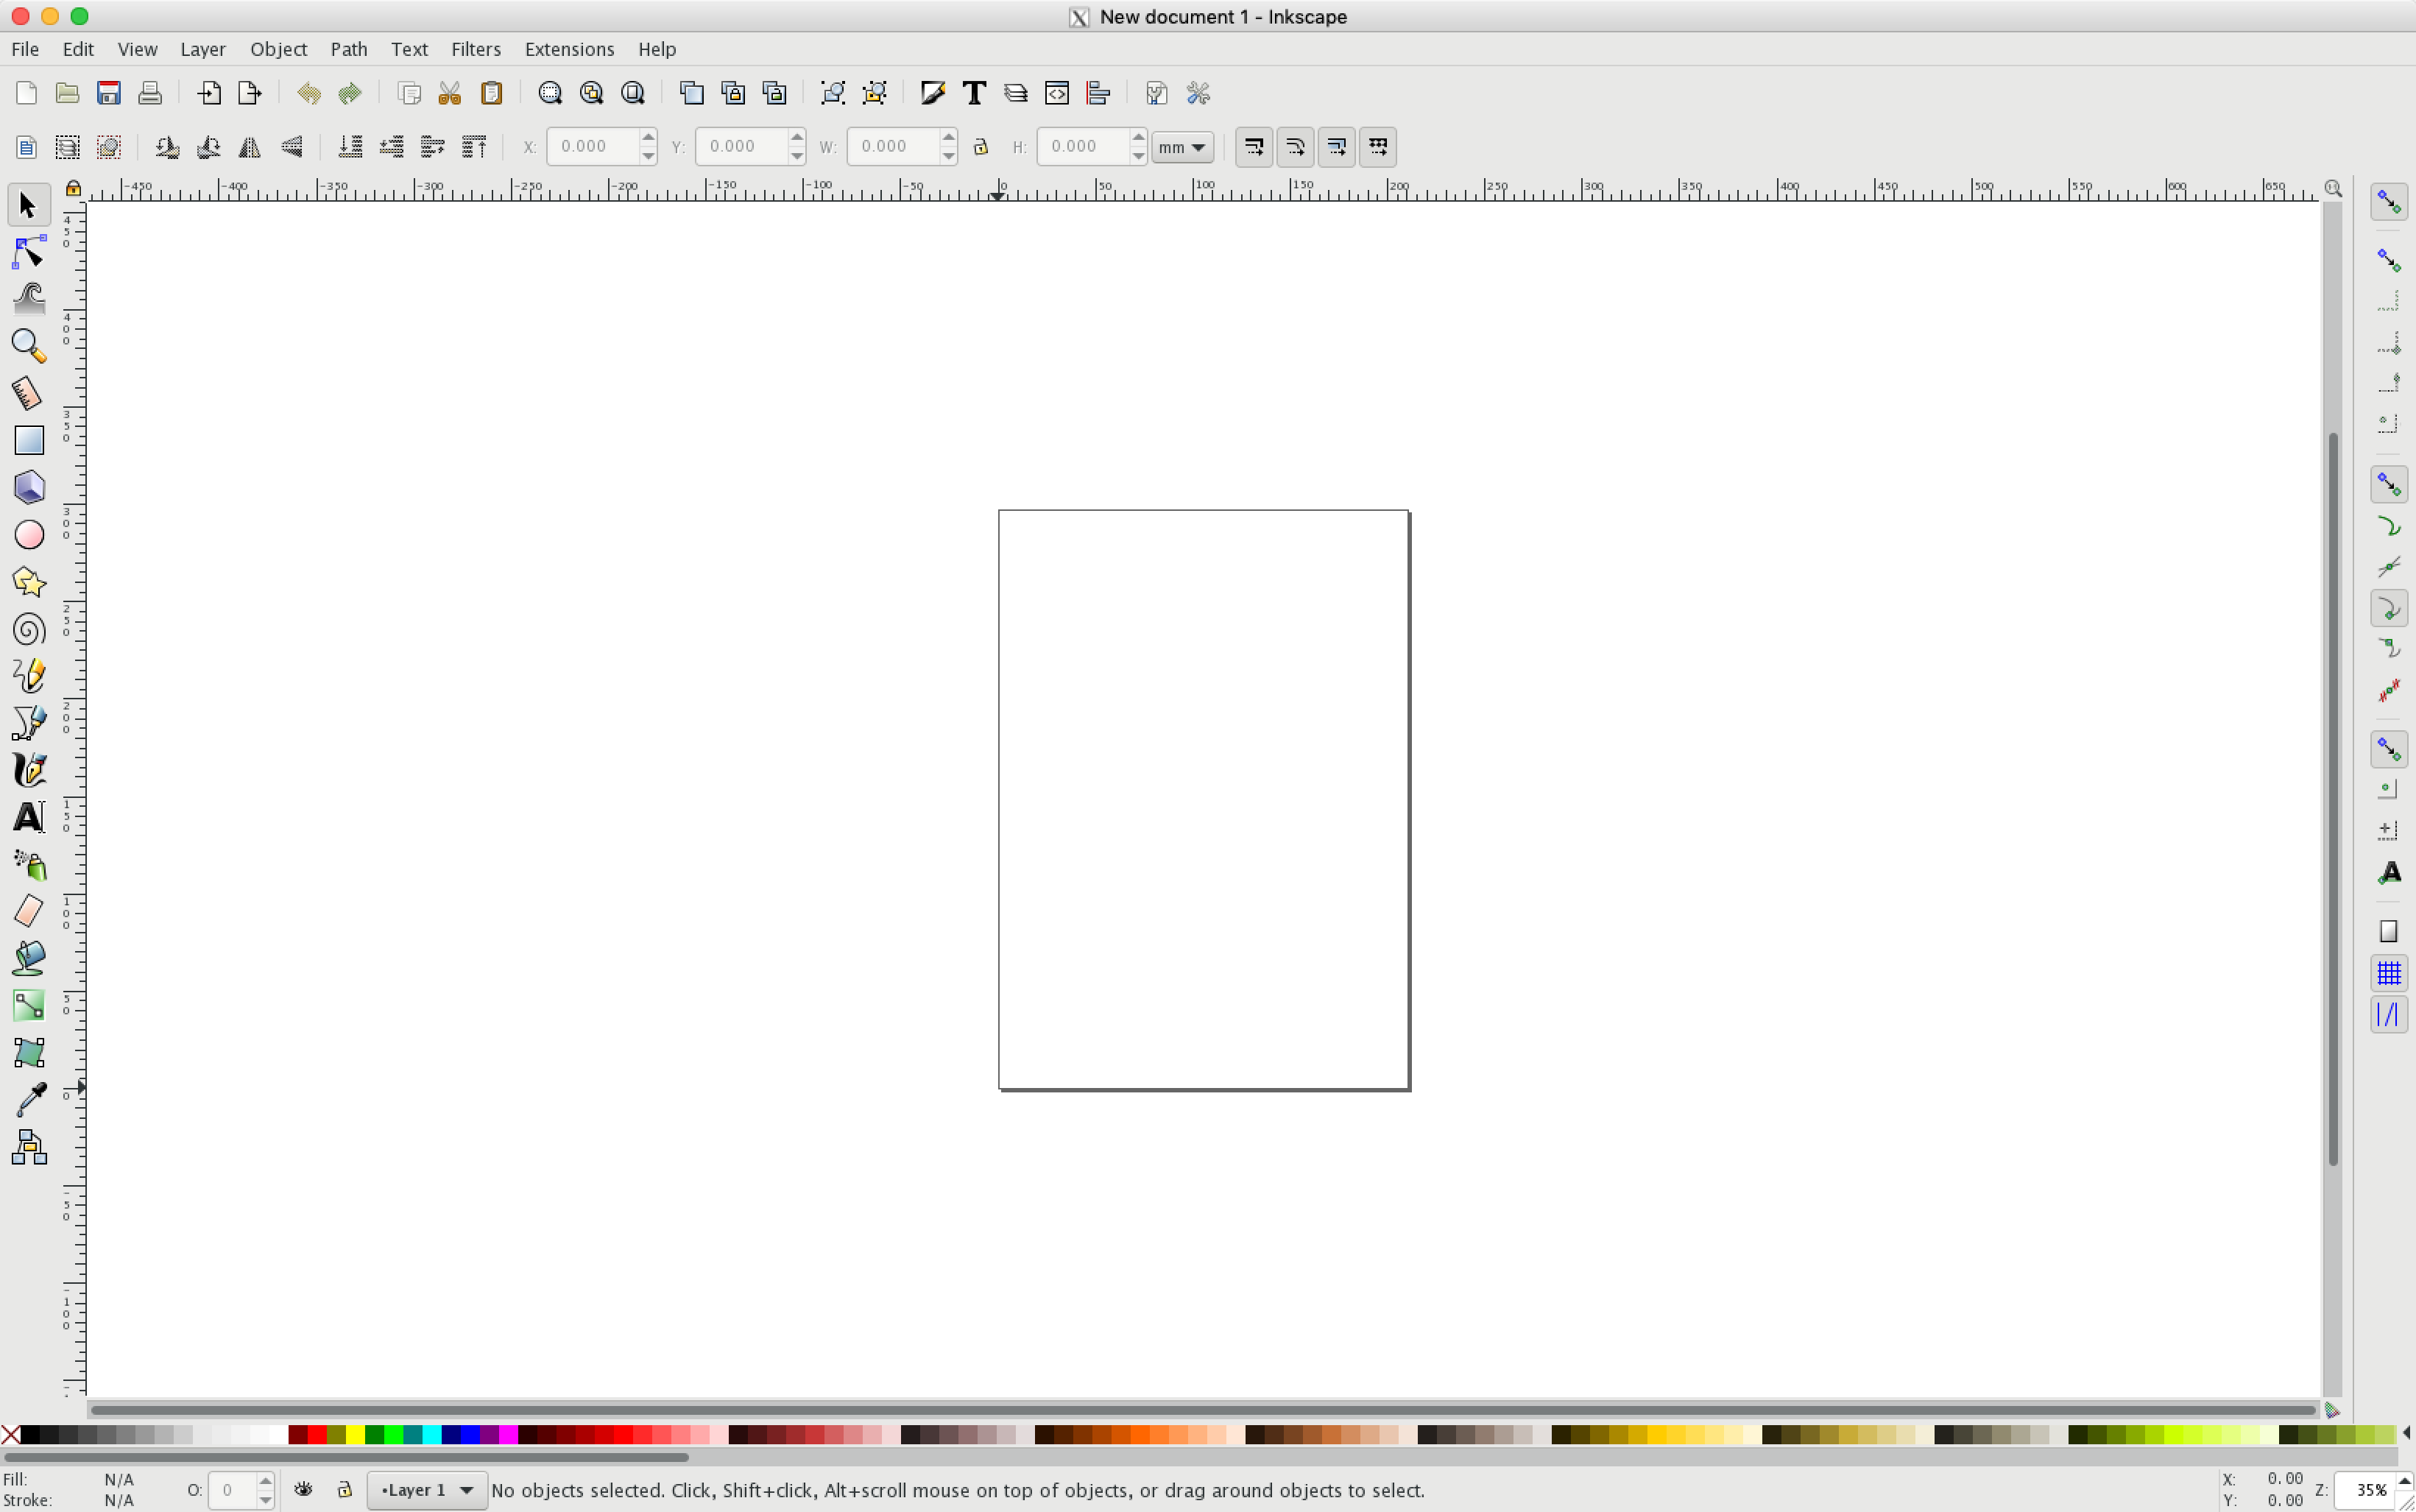
Regardless of your installation method and specific operating system, when you finally get it installed, launching Inkscape should look similar to the following:
You are ready to get started using Inkscape!
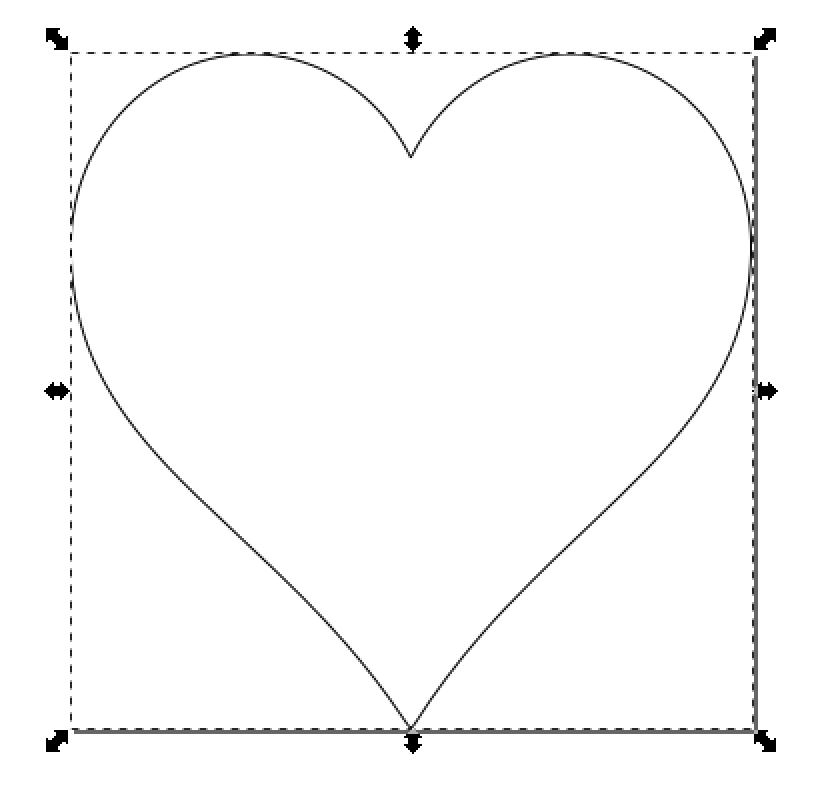
One of several applications for creating a DXF in Inkscape is when designing custom PCBs in EAGLE, you can create a customized (non-rectangular) board shape by importing a DXF. However, the dxf needs special preparation in order to be compatible when importing into EAGLE. That is, EAGLE will not acept anything with closed loops. In this section, we will use Inkscape to turn a simple image into a compatible DXF. We will use the example of a heart, for a cutesy-curvy PCB.
Find an image in the desired shape with high contrast - the higher the contrast, the more likely it is to work.
Copy and paste the image into inkscape using CMD/CTRL+V
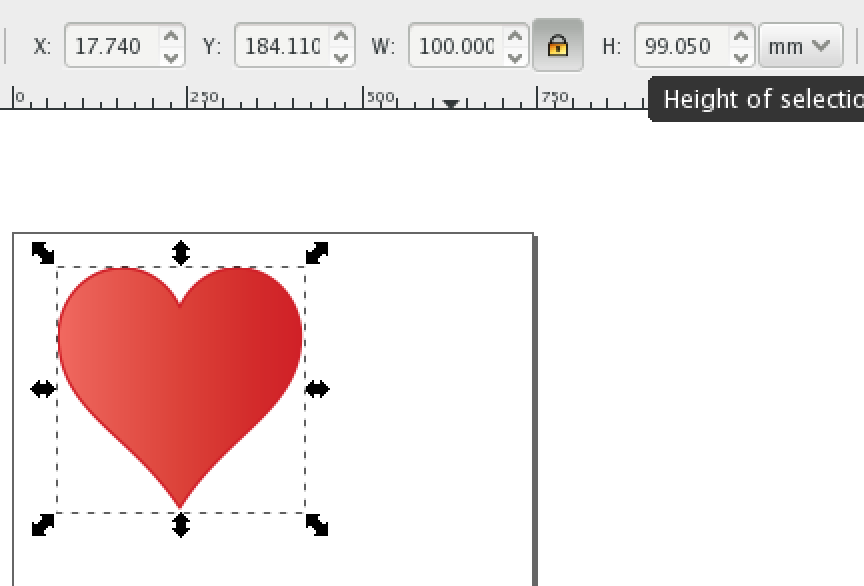
Set the units to millimeters, lock the width to height ratio, and set the image to a width of 100mm. This is arbitrary, and naturally, you can set the size to whatever you need for your application, but for the purposes of prepping a frame for EAGLE, 100mm makes things easy to scale later if you are not sure how large you want it yet.
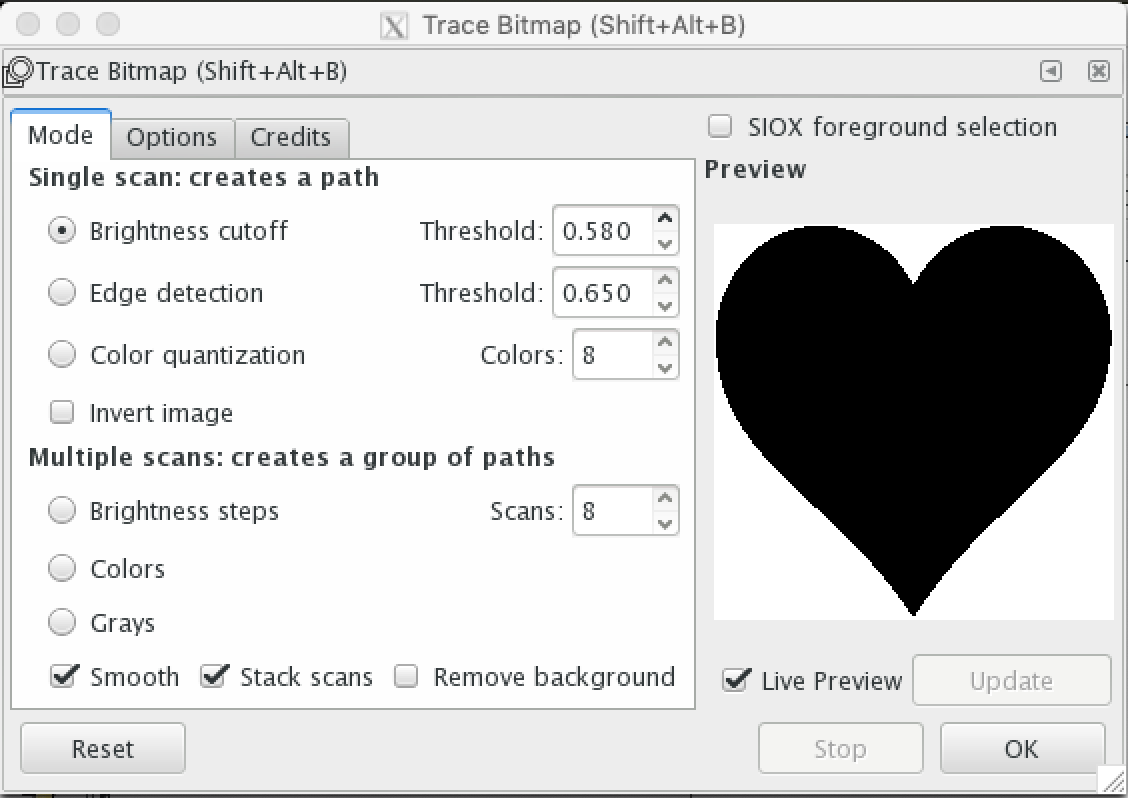
With the shape selected, click Path > Trace Bitmap (or SHIFT+ALT+B). In the window that opens, select live preview and edit the cutoff threshold until you get a good trace of your shape. If your colors are inverted (the shape you want is the lighter portion of the image), click Invert image. This step is why a high contrast image is important, but if thresholding isn’t working for you image, you can experiment with edge detection. For this application, the other options are not useful.
When you have a good preview, click Okay. The preview is less detailed than the actual bitmap, so you may want to fiddle with settings a bit more once you see how it turns out. To try again, make sure original image is selected - if you have the bitmap selected, nothing will happen when you click Okay.
When you satisfied with the resulting bitmap delete the original image - you only need the bitmap.
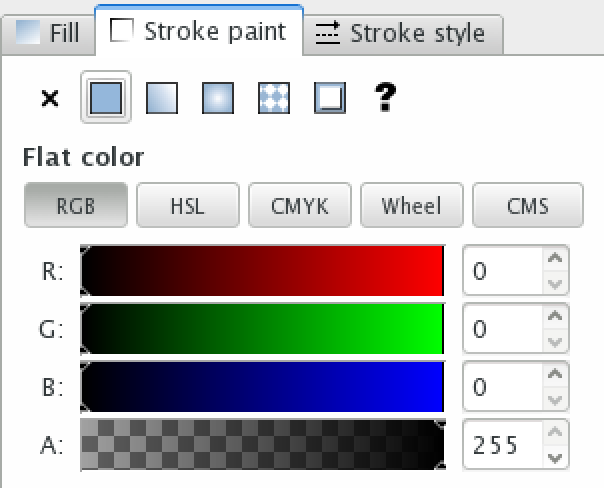
Open Fill and Stroke under the Object menu, and set the fill paint to None and the stroke paint to any color (e.g. black). If the stroke width isn’t an acceptable size, edit it under the Stroke Style tab.
For the heart we’ve chosen, we can skip a step, but let’s say instead we chose this one, which has that extra curve after we trace the bitmap. With Path > Break Apart (CTRL+SHIFT+K), you can separate all the closed paths in an image, and delete the ones you don’t want.
The general procedure for that is:
Now that we have the outline of the shape we want, we need to make a few edits to ensure it in the right format for EAGLE.
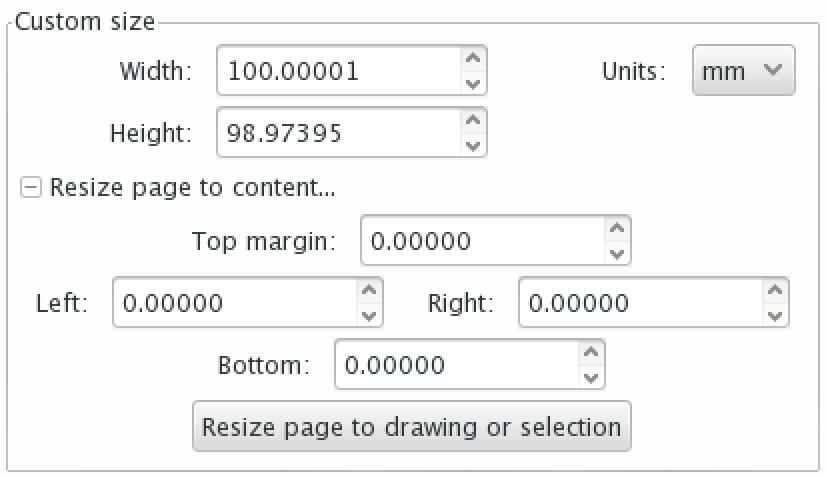
Reset the width to 100mm, in case it got minor adjustments while we were messing with it. Then click on File > Document Properties, Resize page to content, and Resize page to drawing or selection. Now the size of the page should match the containing square of your image.
Now, follow these button clicks exactly. Some of them are not necessary if you traced the bitmap, but if your image came as an outline and you could skip to this step, then you need to follow them all. A couple extra clicks does not hurt, to make sure you get everything right.
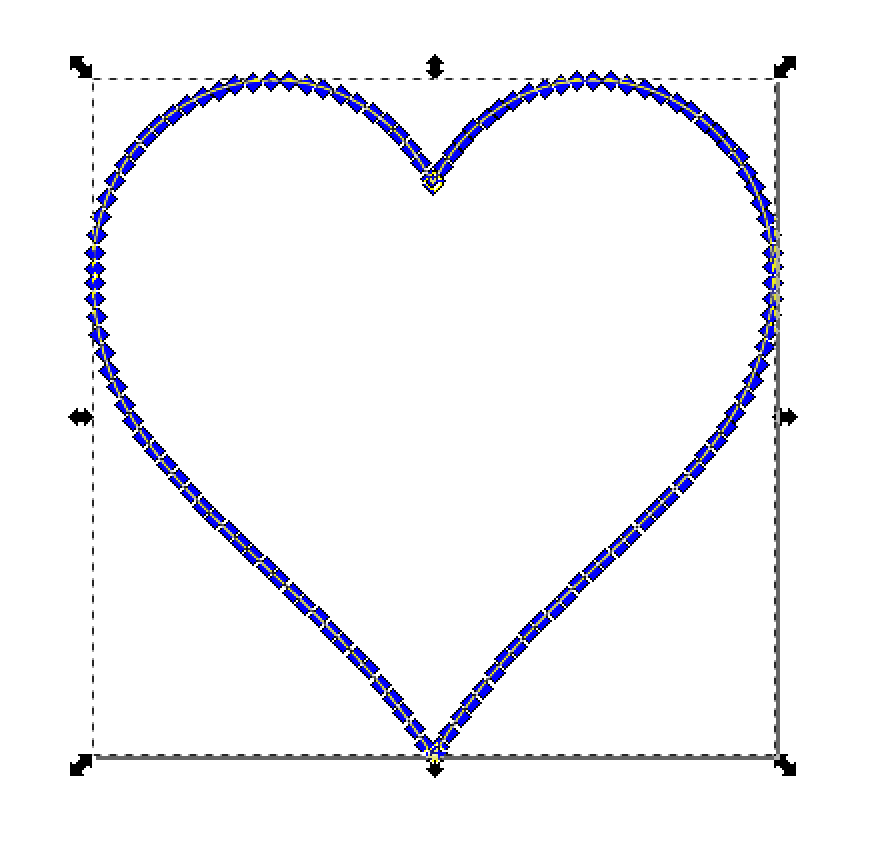
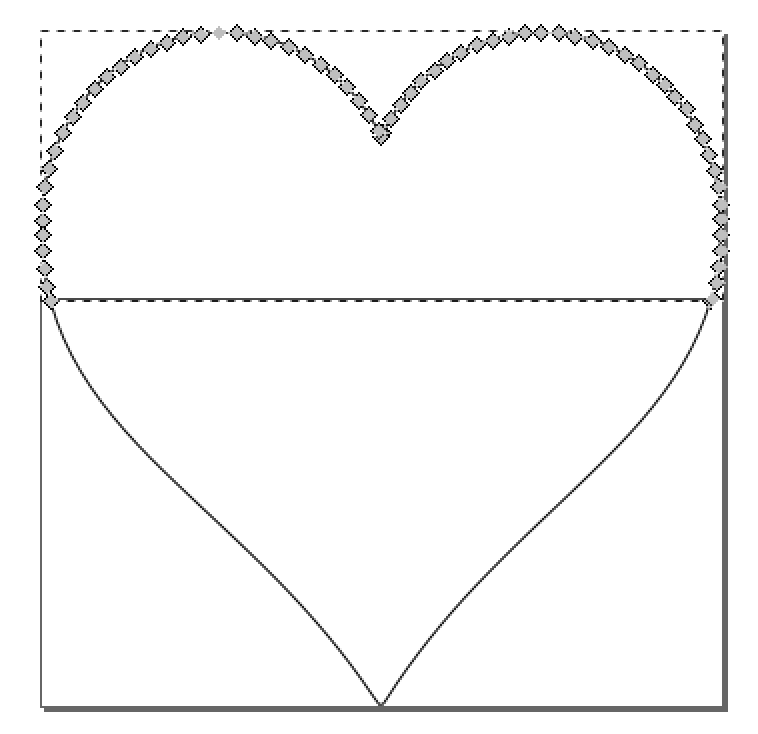
You should now have many more nodes in the path.
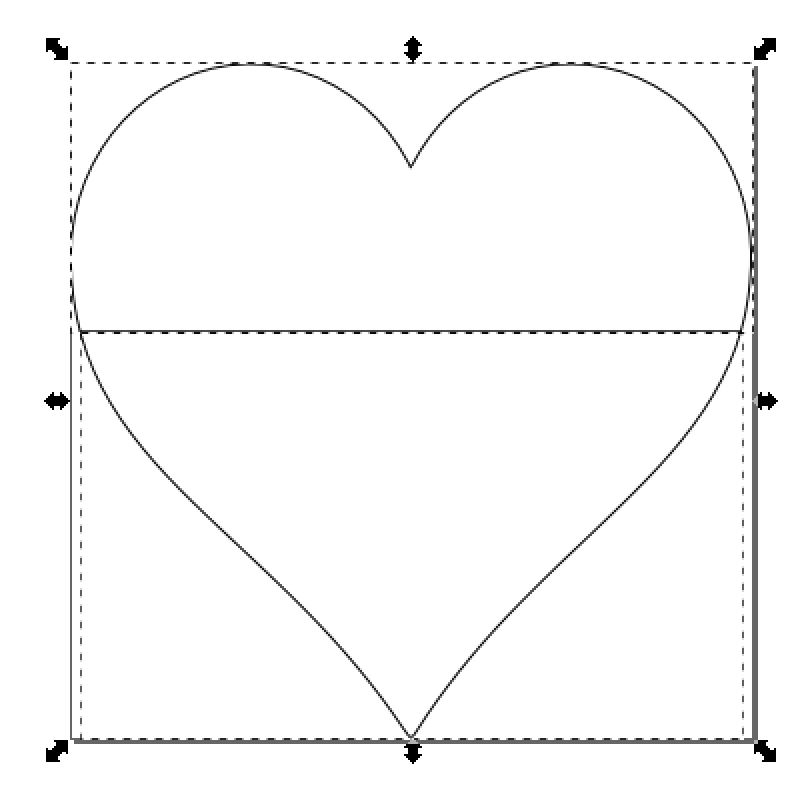
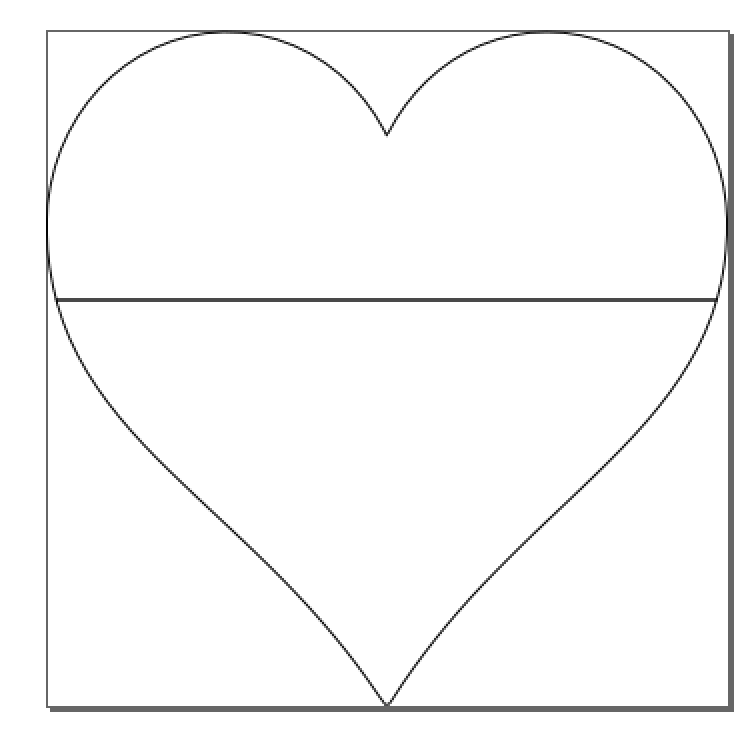
Finally, we need to get rid of any closed loops. This is necessary for EAGLE or else your DXF will be imported and look distorted and wonky. Draw a rectangle (e.g. rectangle tool in the left toolbar) so that one edge of it cuts through the loop. Set it to a different stroke color, with no fill, and set the width of the stroke style to something easily visible.
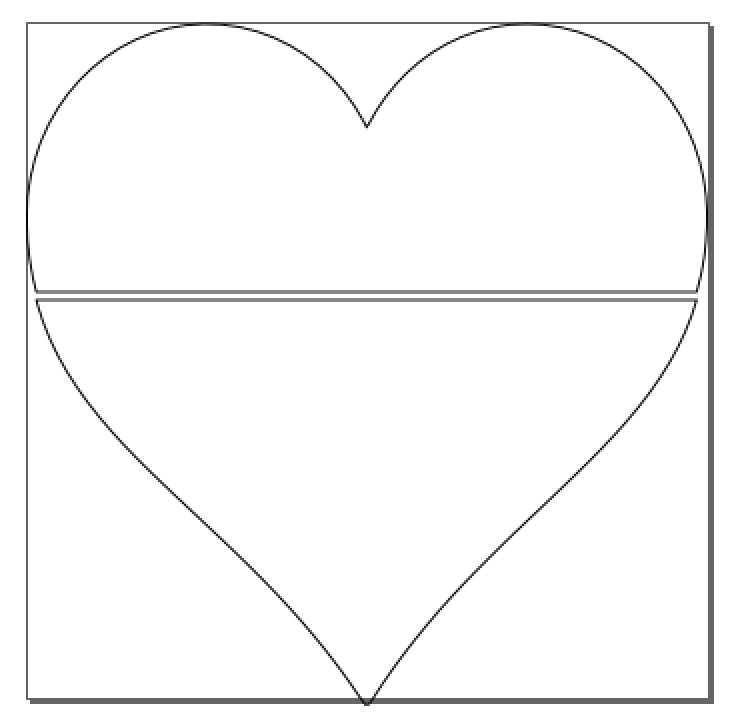
Select both the rectangle and your image, either by dragging across both of them or holding SHIFT while selecting them individually. Click Path > Division (or CTRL + /). The rectangle should disappear, leaving you with two separate paths. Do this for every loop in your image.
When you are done, select each piece of your image and press CTRL+SHIFT+K, or Path > Break Apart. Do this one at a time, once for each piece.
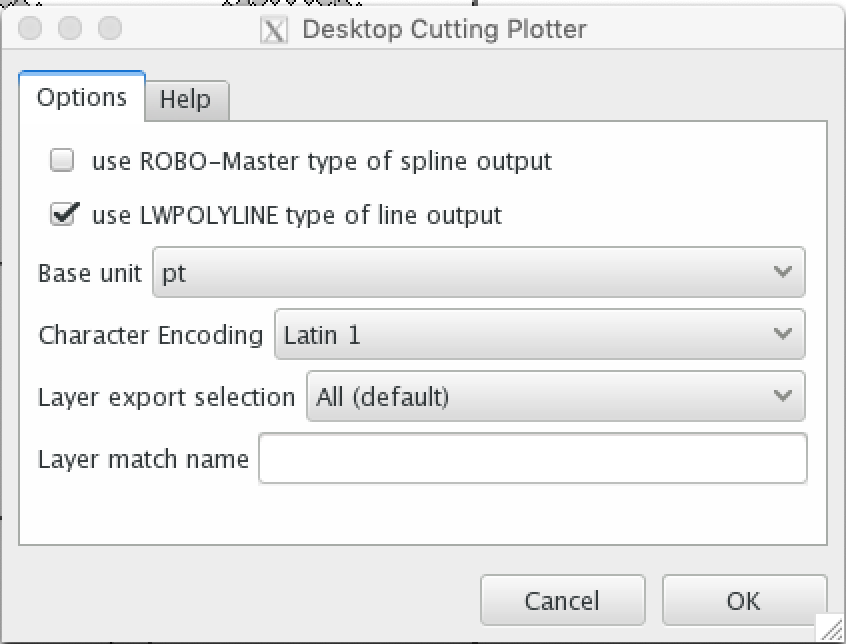
And voila. Click File > Save as, select .dxf as the extension (that is important - DXF!)
Make sure that use LWPOLYLINE type of output is checked, and hit okay.
You can now import this DXF into EAGLE.
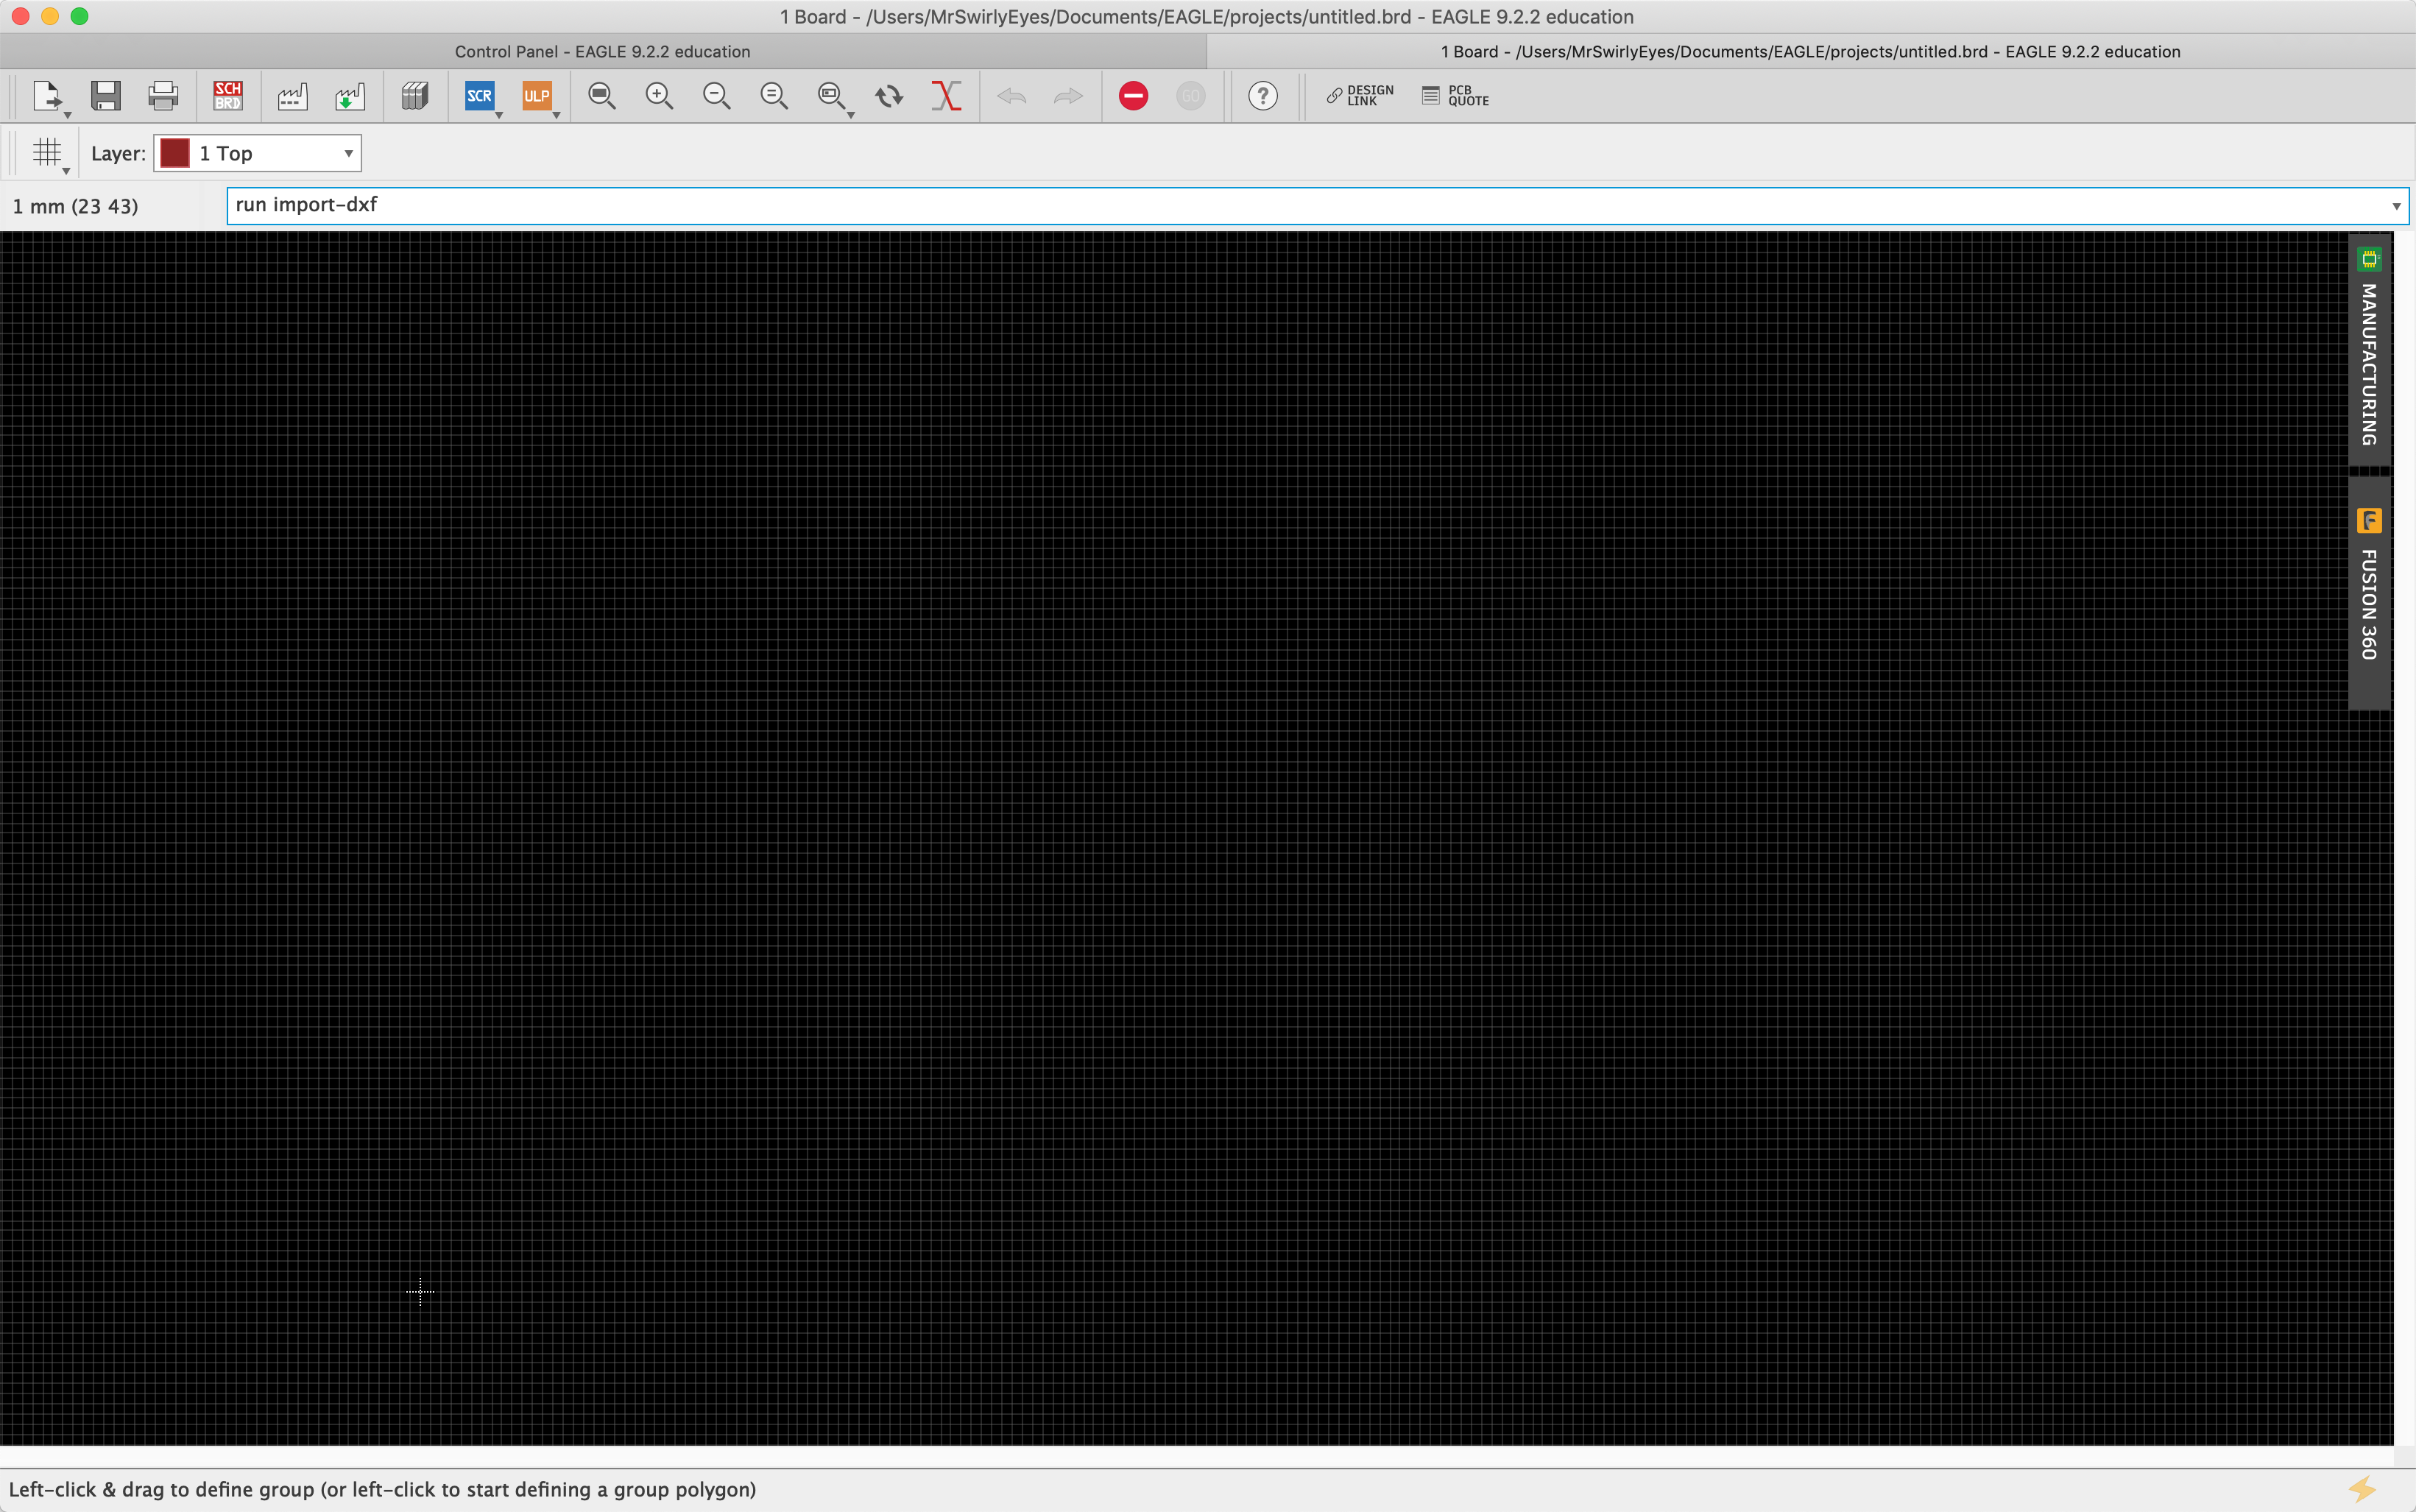
On the EAGLE open a new or existing .brd file.
Delete any existing board dimension drawings. Use the delete command and delete dimensions.
Execute run import-dxf in the command text bar.
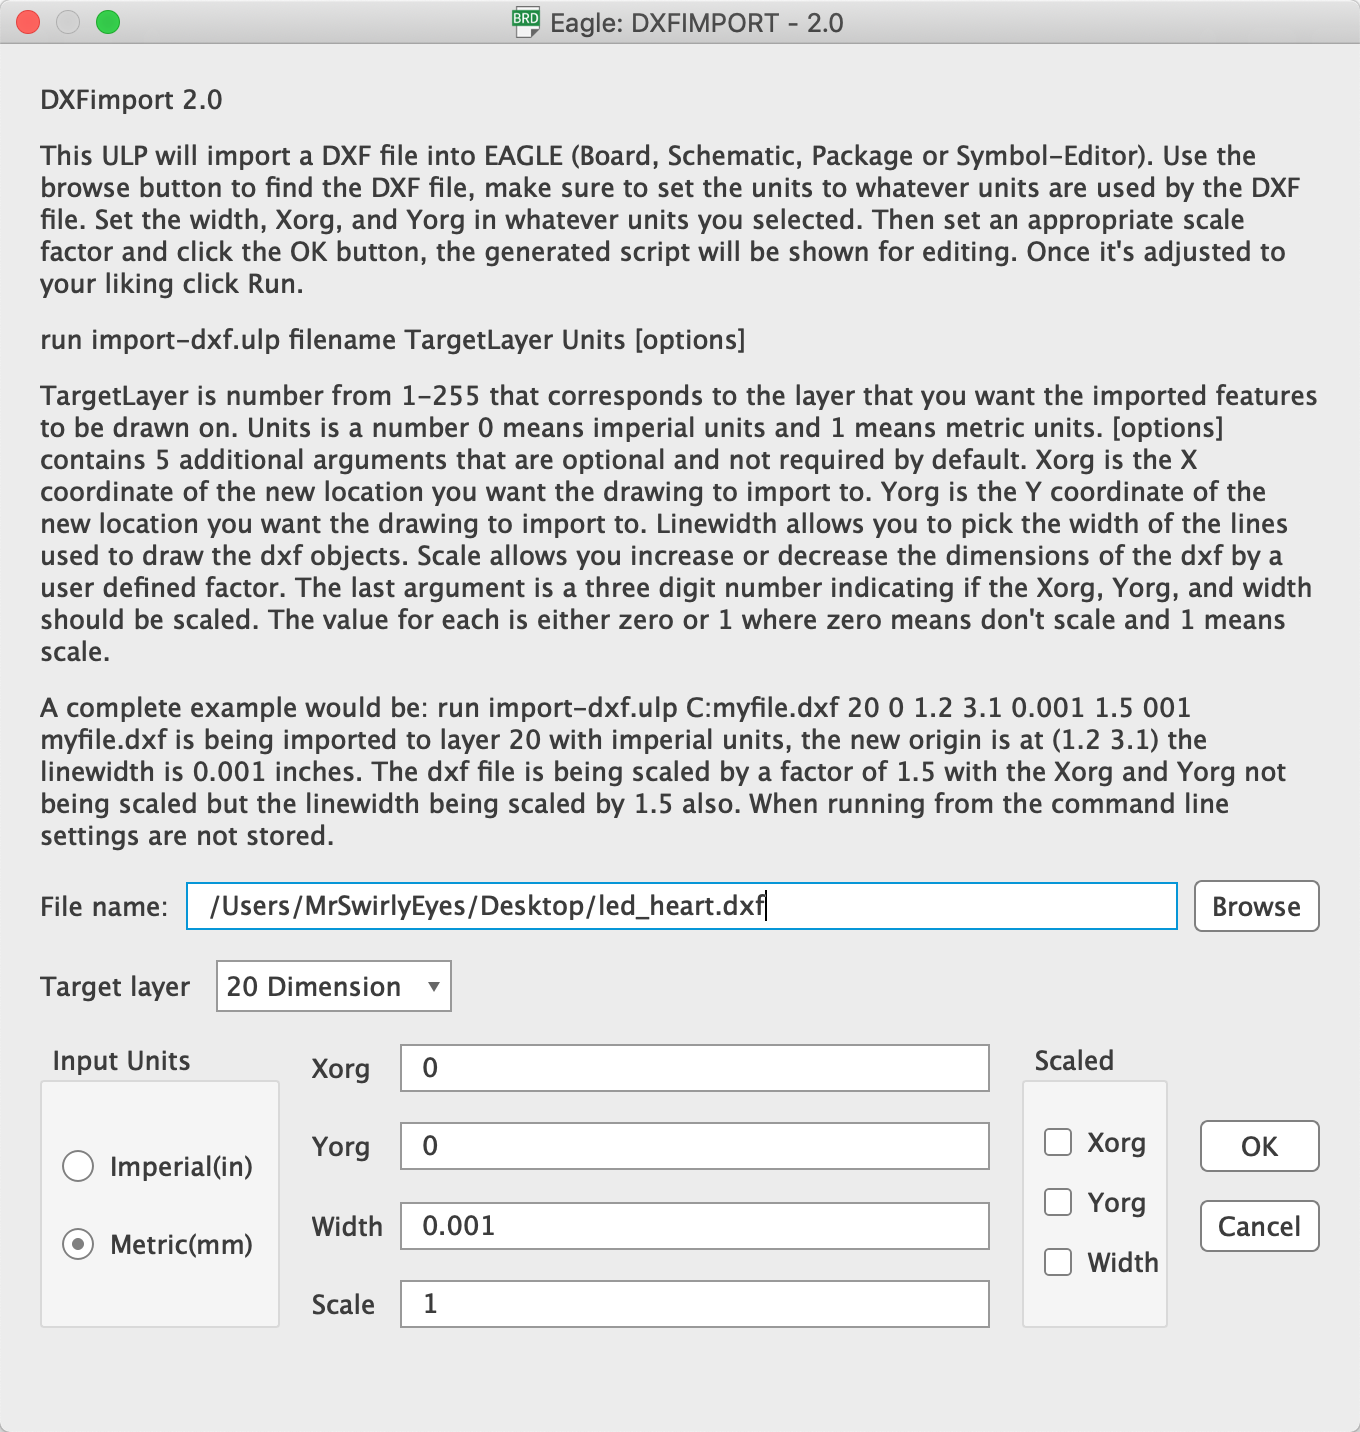
The Eagle: DXFIMPORT window will appear. We need to click Browse and navigate to find your DXF to import.
For Target Layer select 20 Dimension. EAGLE will recognize this as the outline of our PCB board.
You can change the Input Units from Metric(mm). However, since we designed the image in Inkscape using mm, we recommend sticking with mm.
If you want to change the X-origin Xorg or Y-origin Yorg you may change those (otherwise it will default putting the bottom-center of the image at the origin of the board). Leave the width at 0.001.
You may have to experiement with the Scale factor to import your DXF at the appropriate size. This is where it is handy to have selected 100mm width in Inkscape as it is (hopefully) easier to scale a nice number.
When you are done with the settings, click OK.
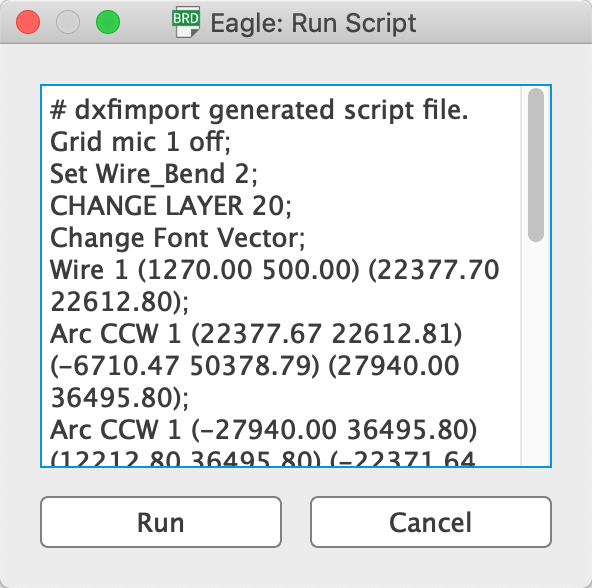
A new window will appear that prepare to run the script that will draw our DXF into the EAGLE .brd file. Click OK to execute the script.
After a few seconds, the Board window will rescale and the image DXF will be imported.
You may delete any extra artifact lines you see fit that may have been imported in the process, including the ones that appeared when you removed closed loops.
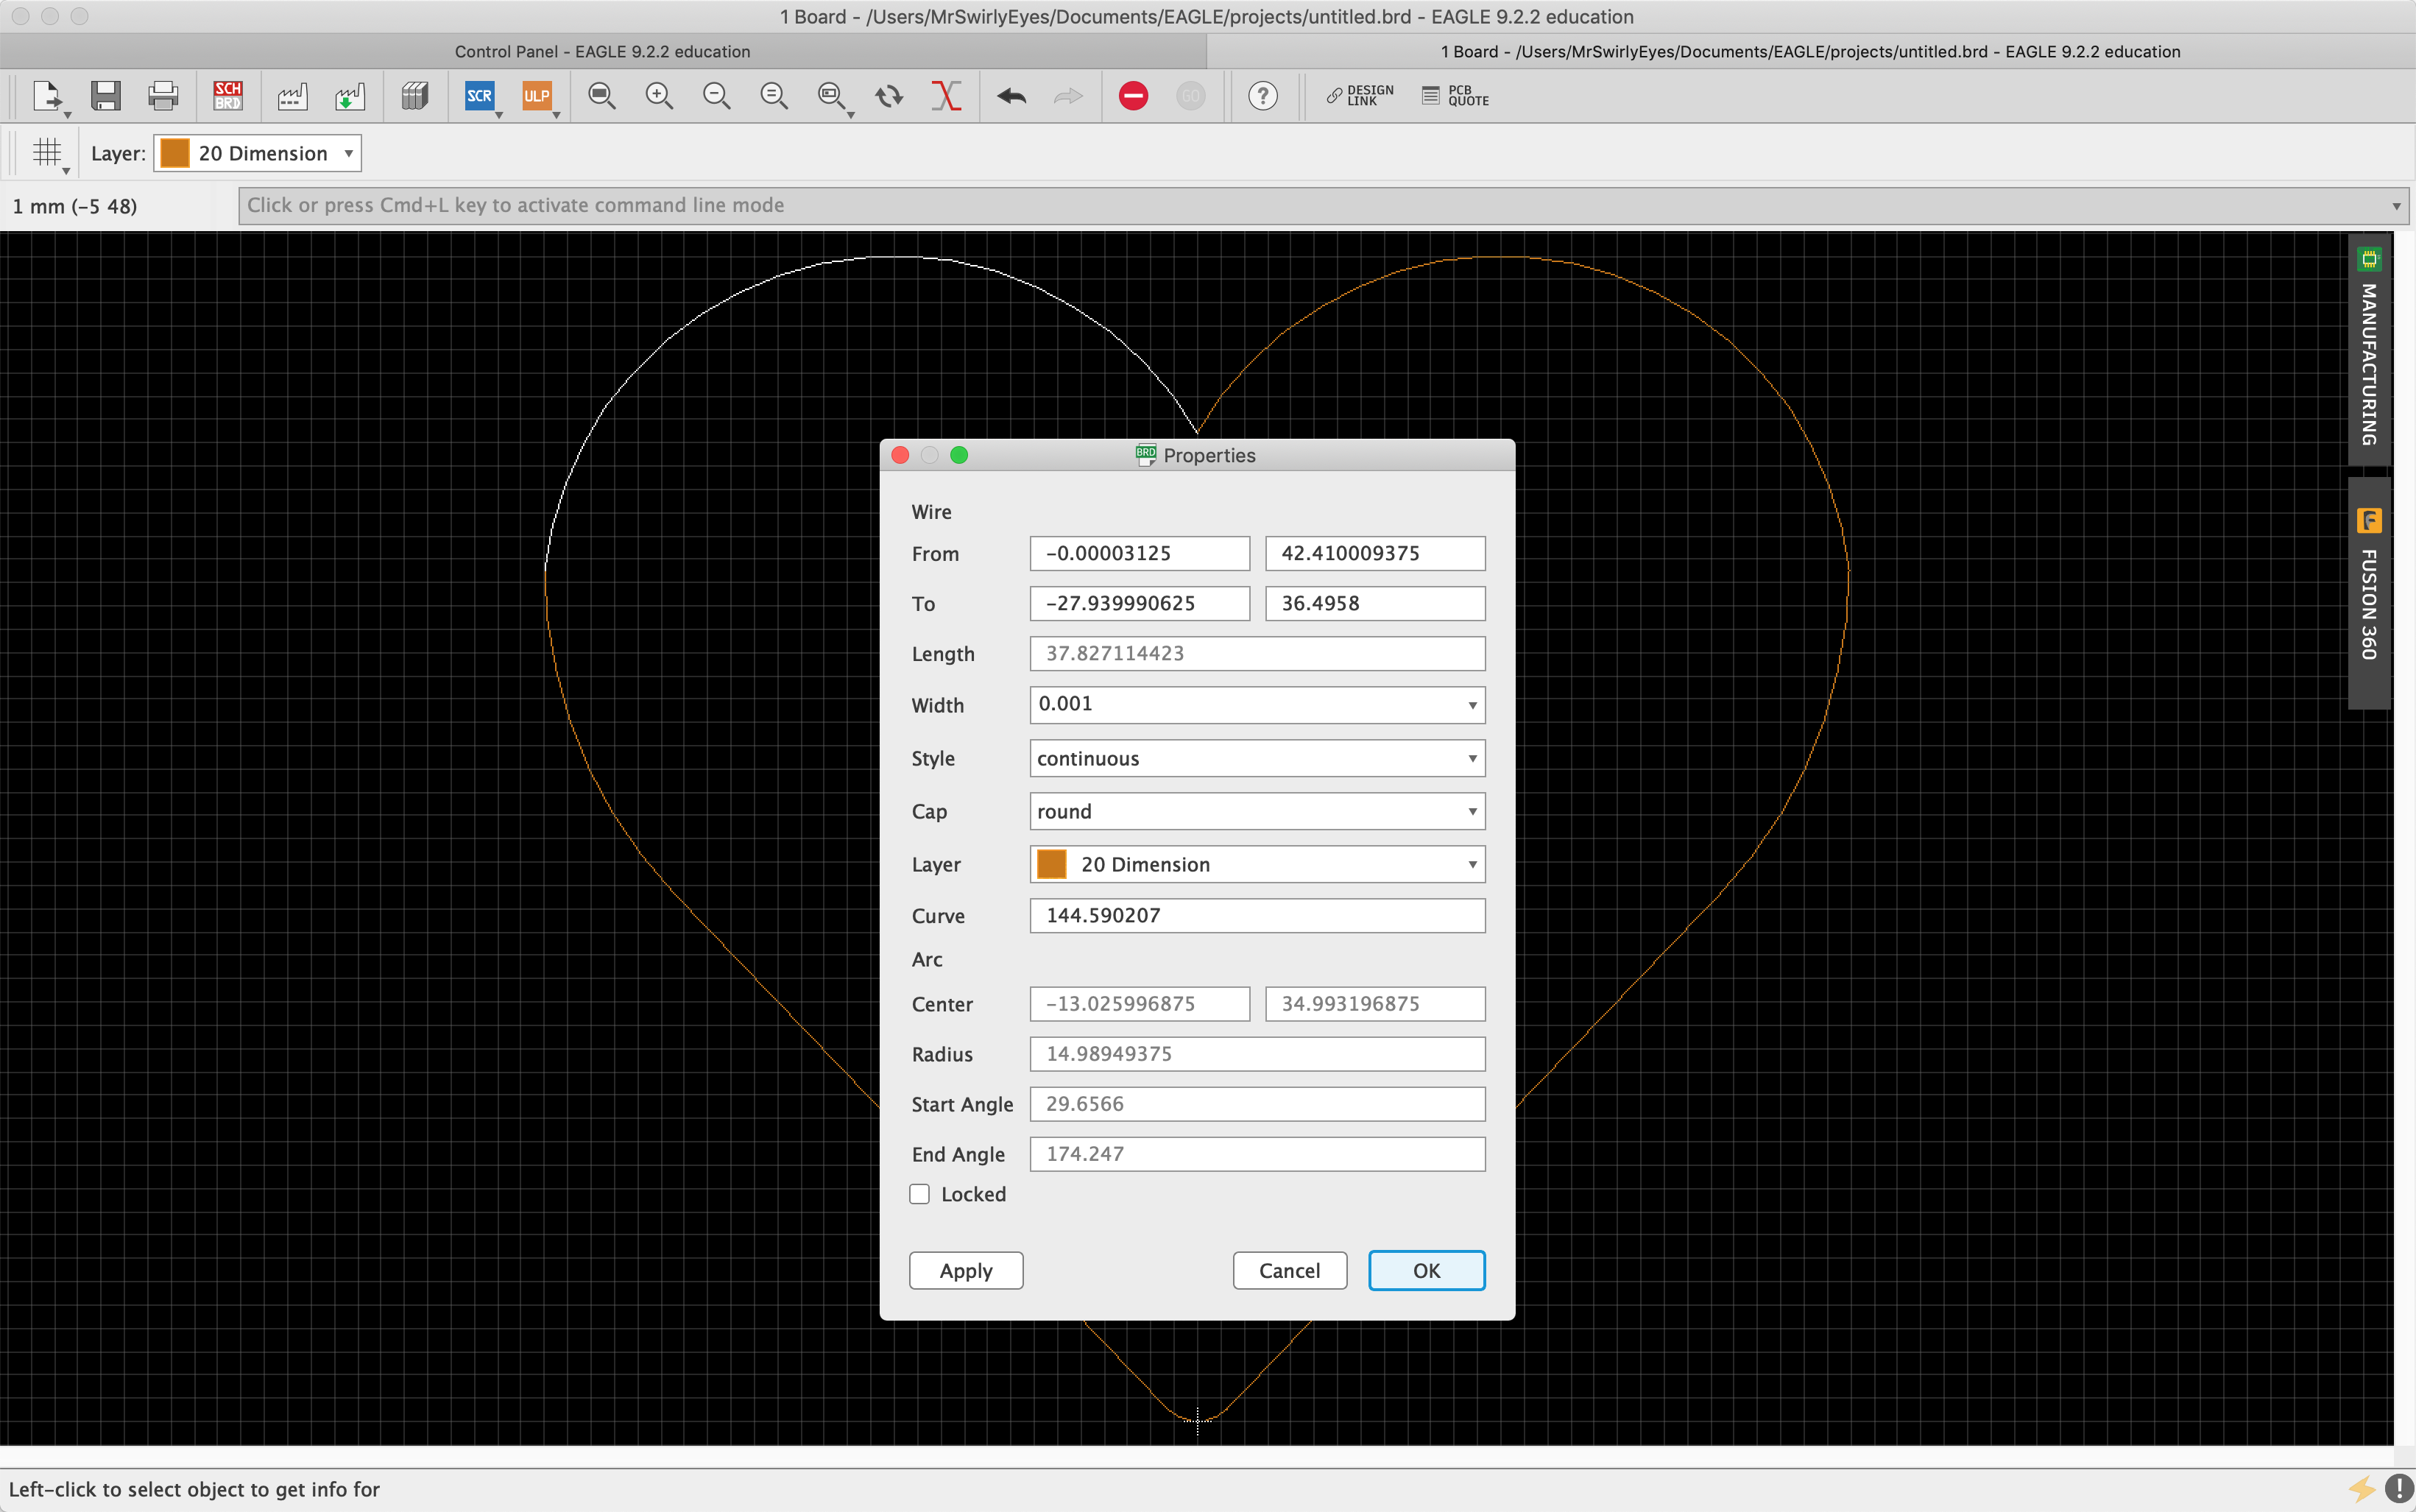
Everything looks good, but we may have a potential problem here. If you are familiar with EAGLE, then the board (inside the dimension) should be black colored with a grey color outside the dimension. However, this is not the case.
The problem is when importing the DXF the EAGLE importing script makes a numerical approximation and breaks up the "continuous" image we see into several finite lines and arcs that makes up the image we see in EAGLE. Which looks good, but a closer look will reveal otherwise.
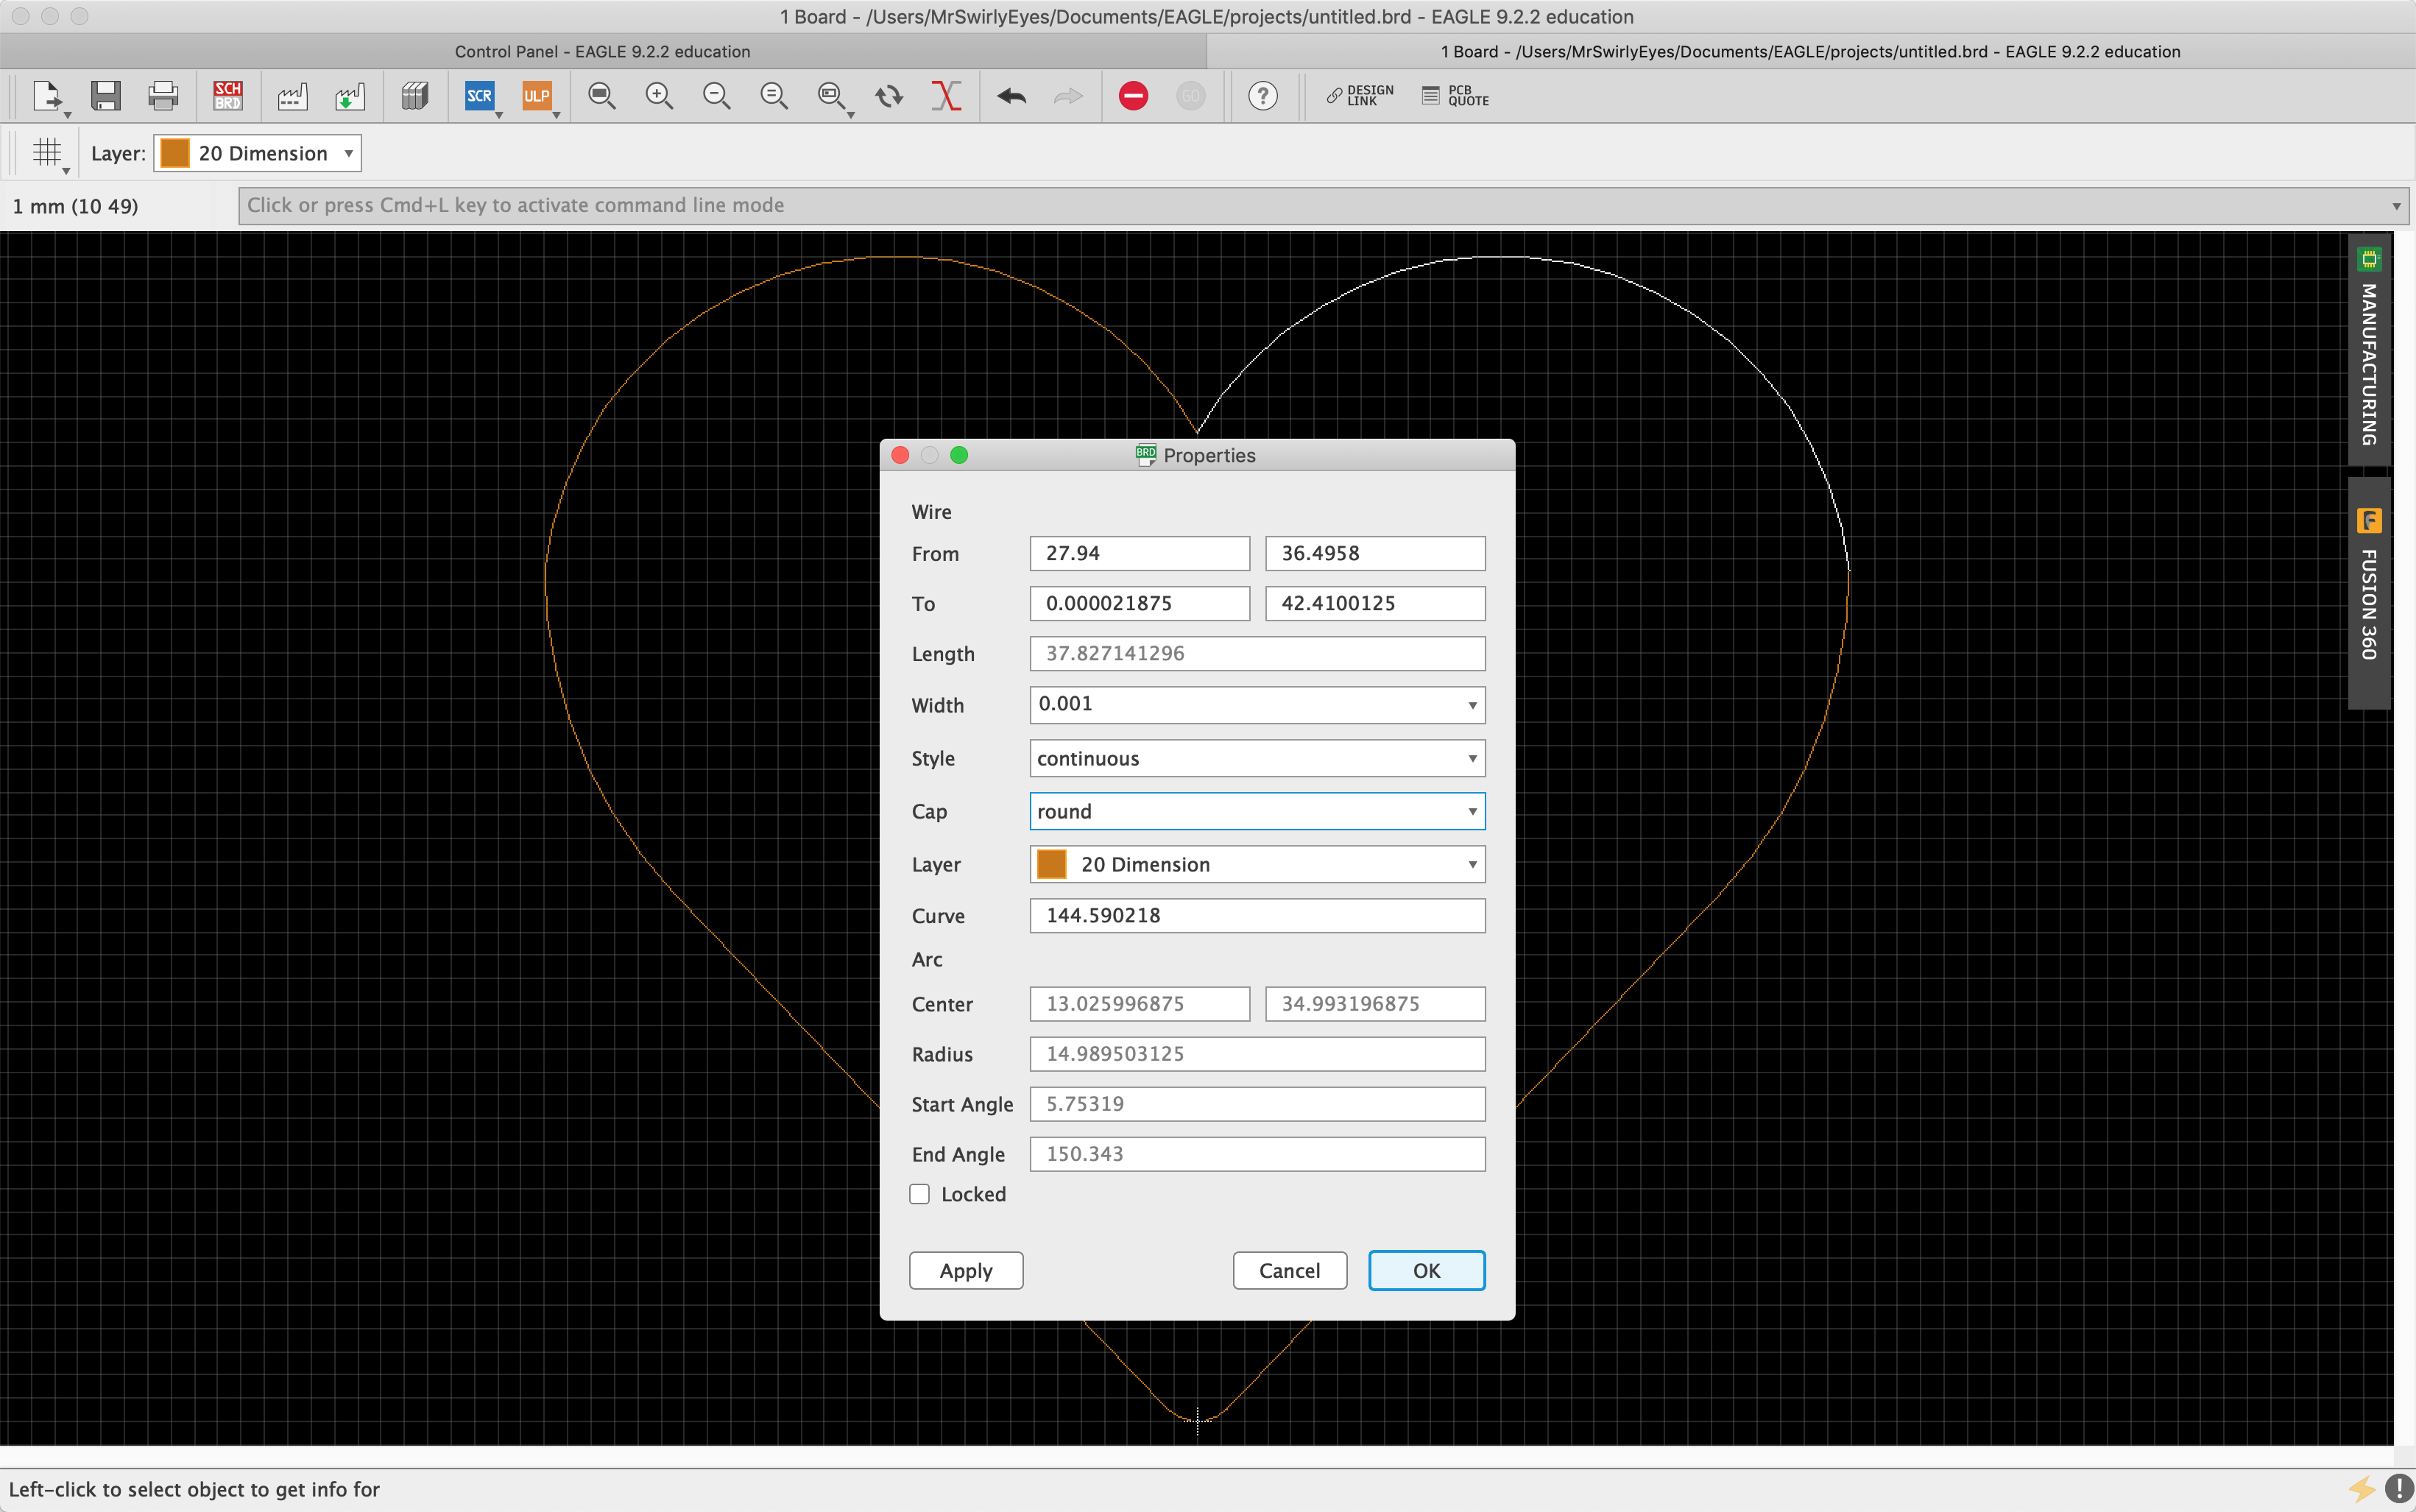
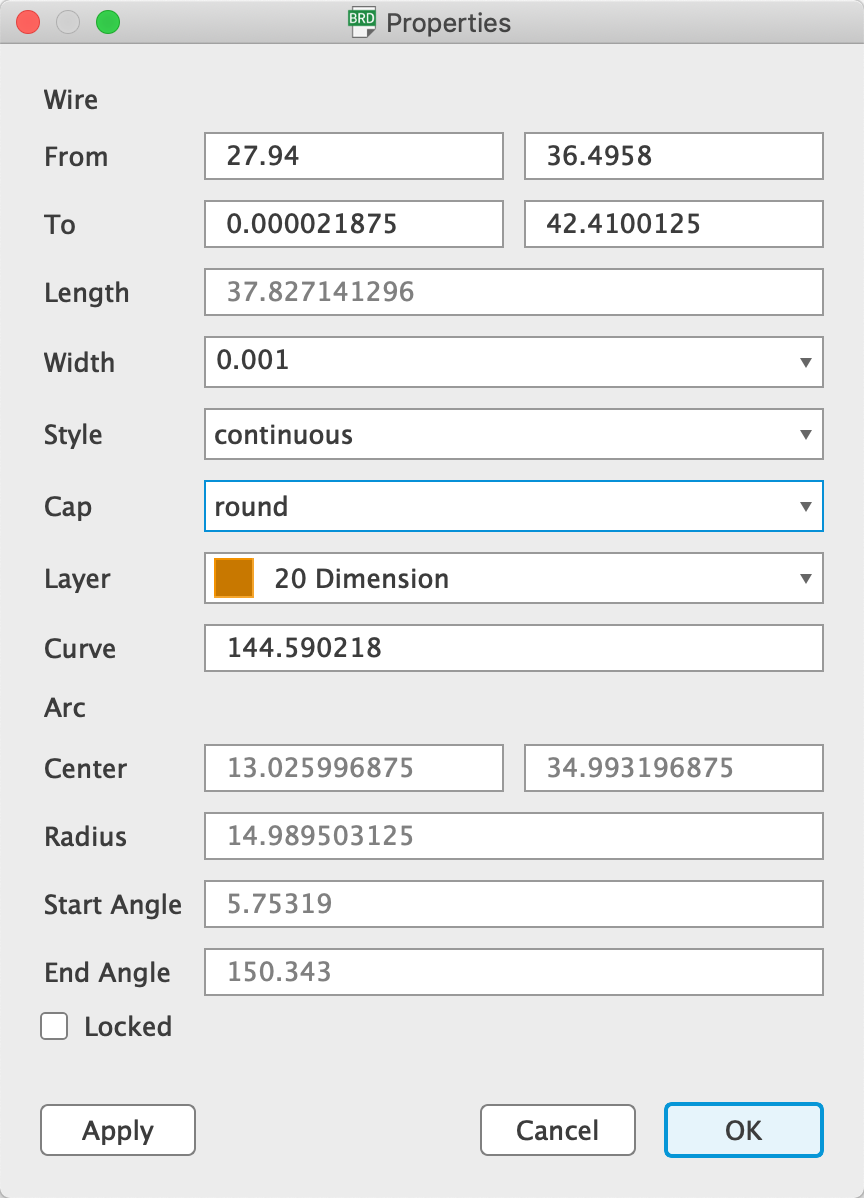
If you use the info command and left-click on one of the dimension lines you can see the arc or line of the segment. Notice it is only a segment of the entire outline. Observe the From and To coordinates.
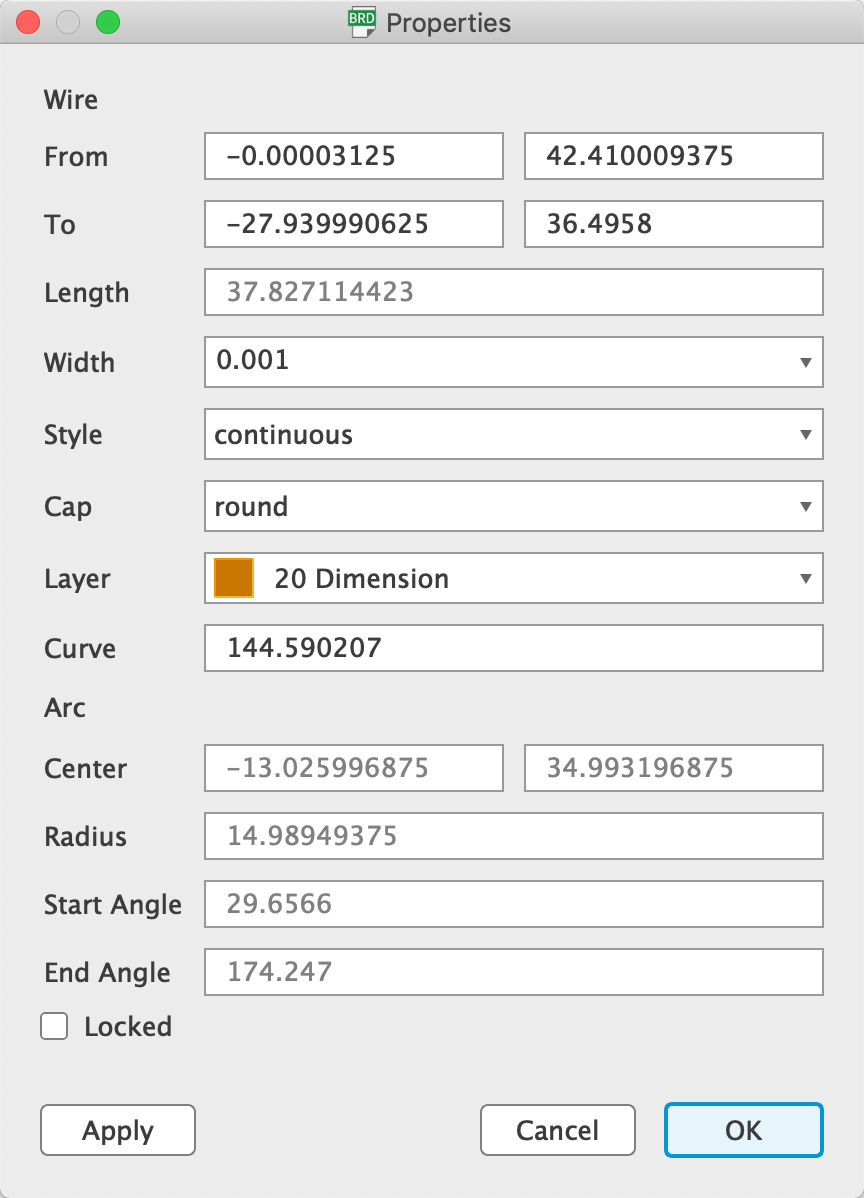
Clicking on the segment next it shows its information. Observe the From and To coordinates.
Putting the two sets of coordinates side-by-side reveals the numerical approximation inaccuracies:
See how the Left Segment From y-coordinate of 42.410009375 and the Right Segment To y-coordinate of 42.4100125 are very close to the same number. Similarly see how the Left Segment From x-coordinate of -0.00003125 and the Right Segment To x-coordinate of 0.000021875 are very close to the same number (this one is extra weird because it crosses over 0). This is the numerical approximation inaccuracy. Copy one of these values from either segment (for both the x and y coordinate) to the other so that these points are connected.
Repeat this process for any segments that are not connected. You can tell if a segment is not connected by using the move tool, clicking on a segment and wiggling the segment and see that it is not connected.
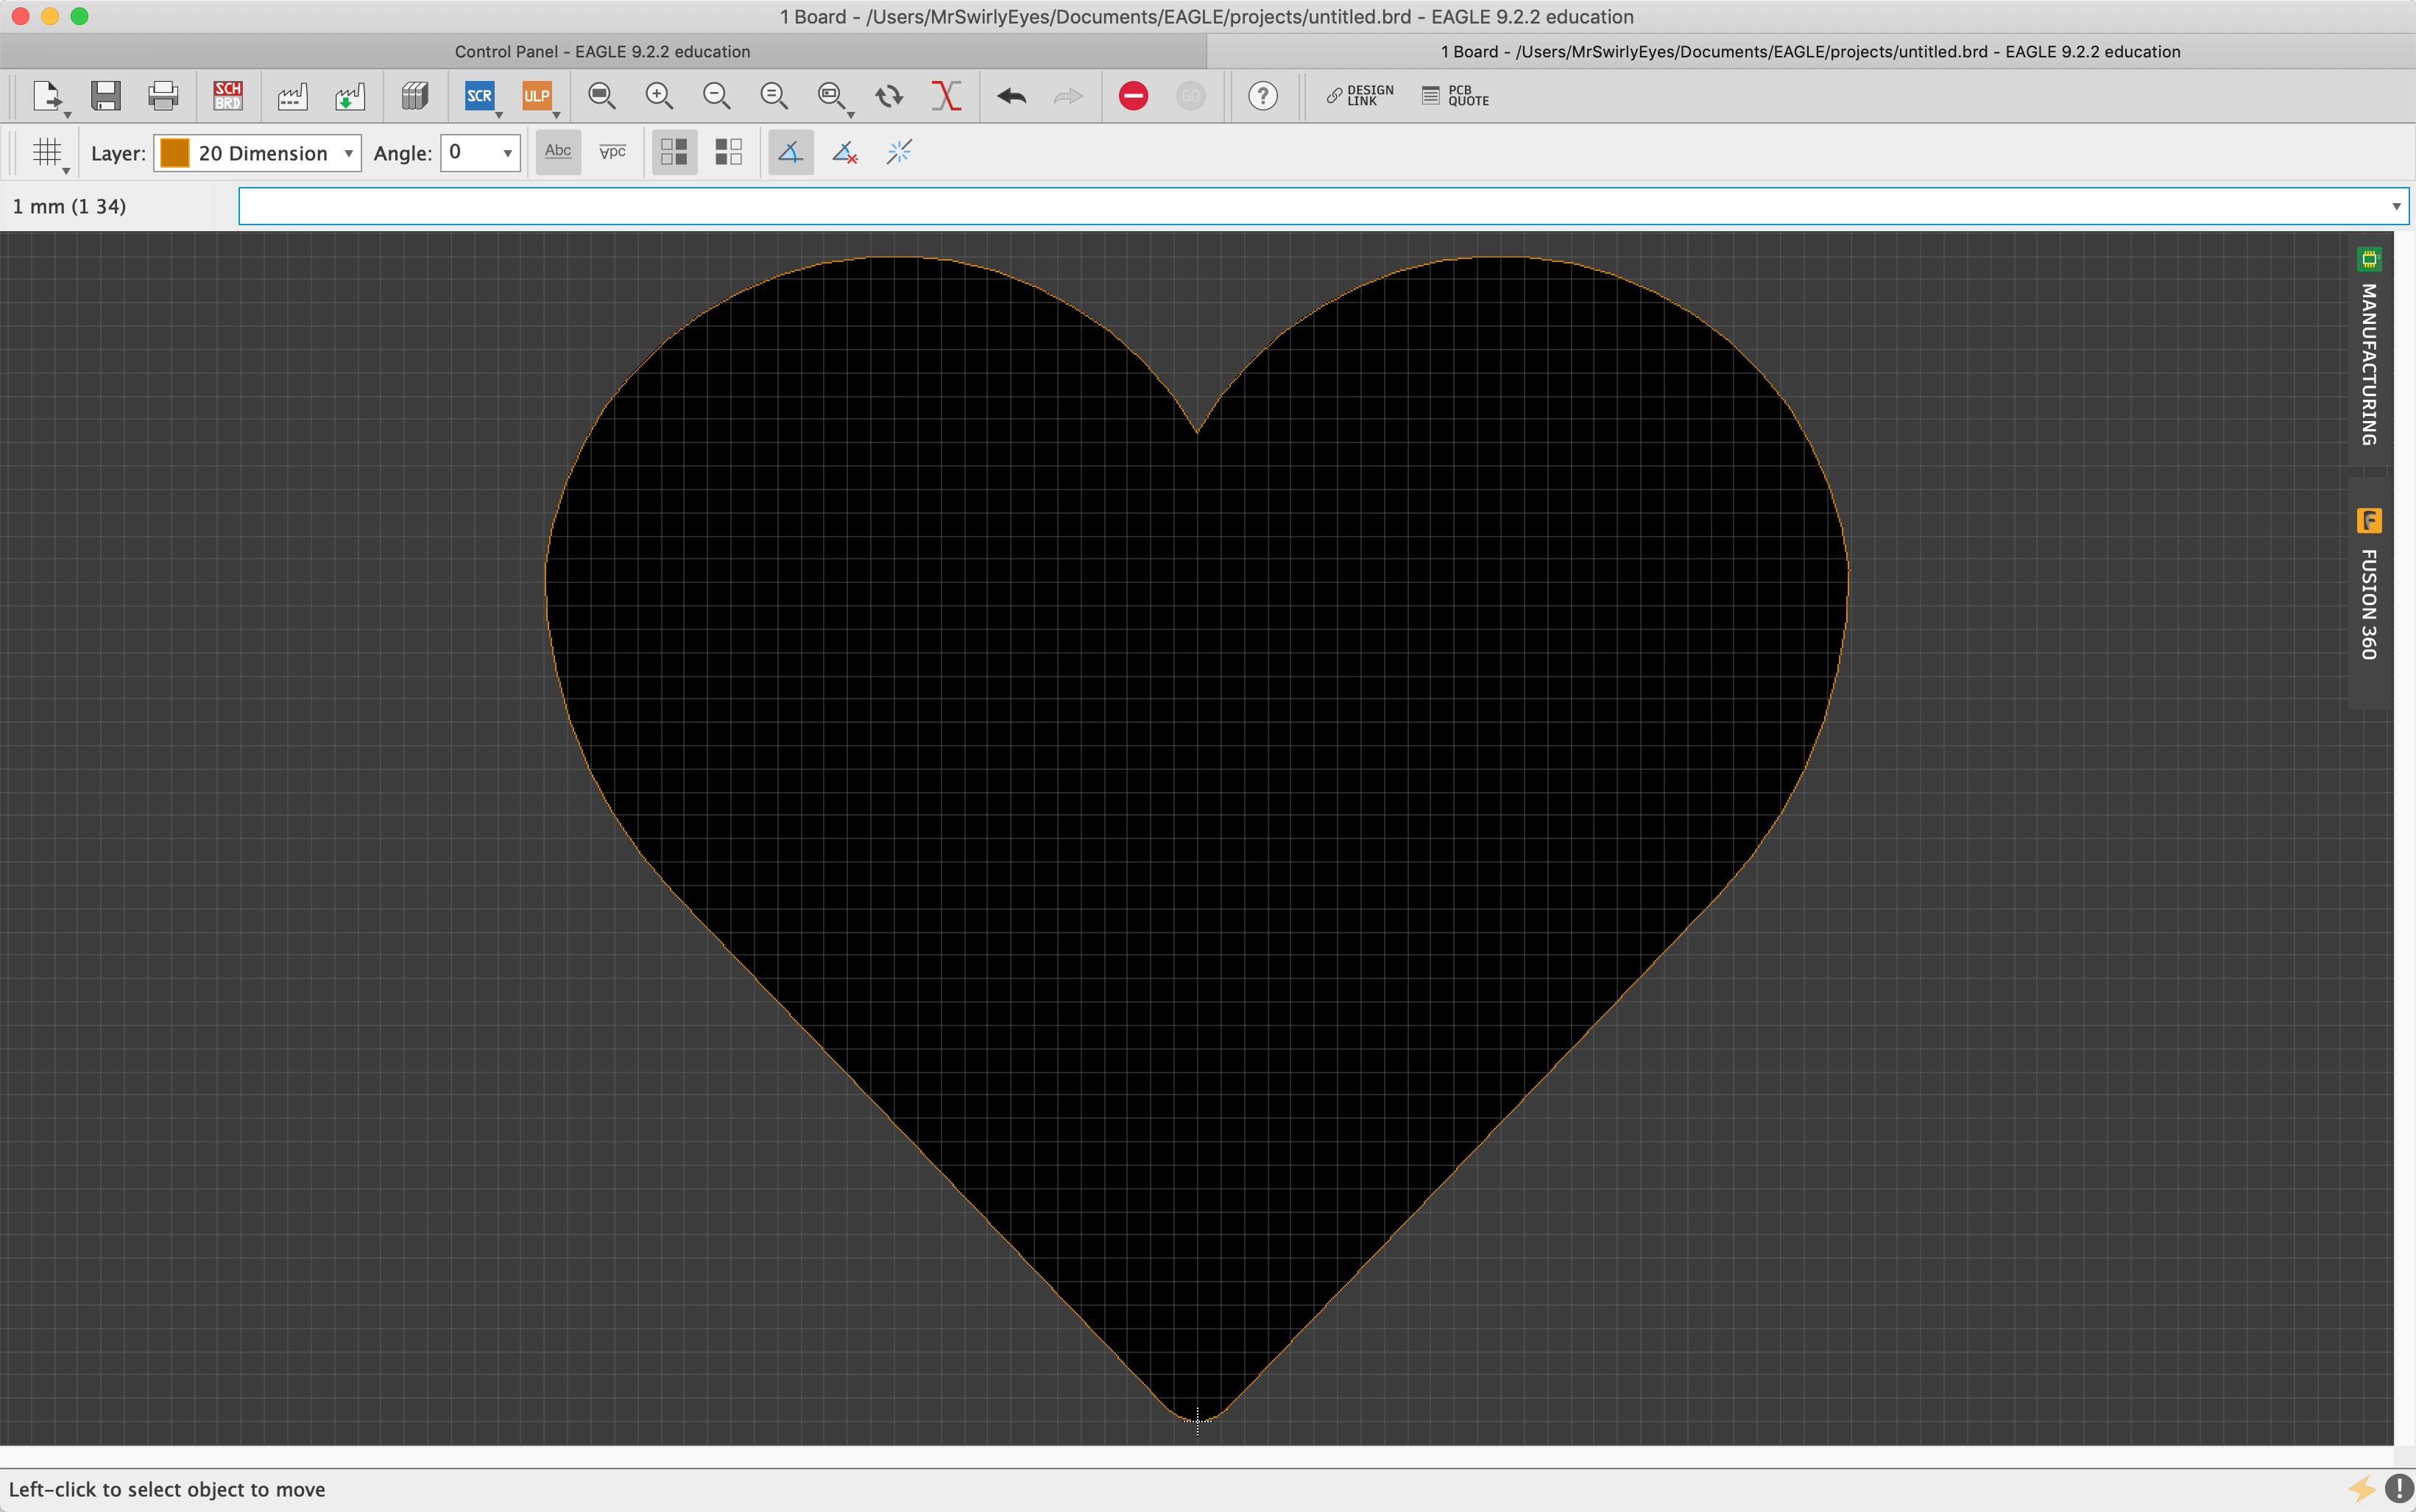
Repeating this process will finally yield a valid PCB board outline that will generate the filled black board inside the dimension and the grey color outside the dimension.
This is the general process for importing a DXF from Inkscape as your PCB board outline into EAGLE!
With Inkscape installed, you have a powerful tool. Whether it is preparing to cut and raster in a laser cutting procedure, create DXFs of unique shapes to import into EAGLE for an awesome board design, or create works of art.